Skip to content
About
Contact
Cookie Policy
Copyright Policy
Disclaimer
Search
Home
Dinner
Appetizer
Desserts
Drinks
About
Contact
Privacy Policy
Toggle Menu
Home
/
Appetizer
Appetizer
Cheesy Spinach Artichoke Dip Perfect for Any Party
Mango Black Bean Salsa Fresh and Flavorful Recipe
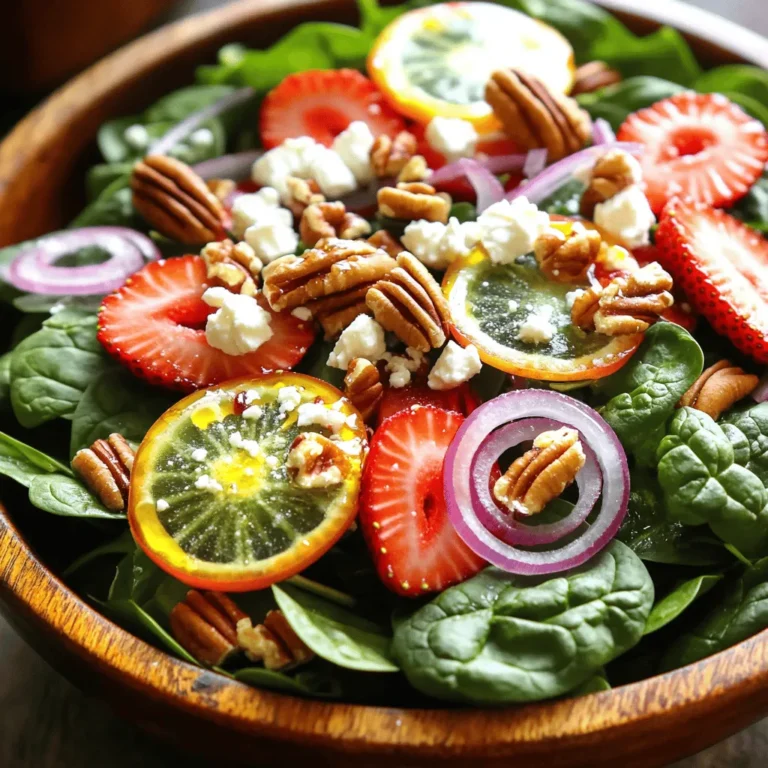
Strawberry Spinach Salad Fresh and Flavorful Delight
Chili Lime Grilled Corn Flavorful Summer Delight
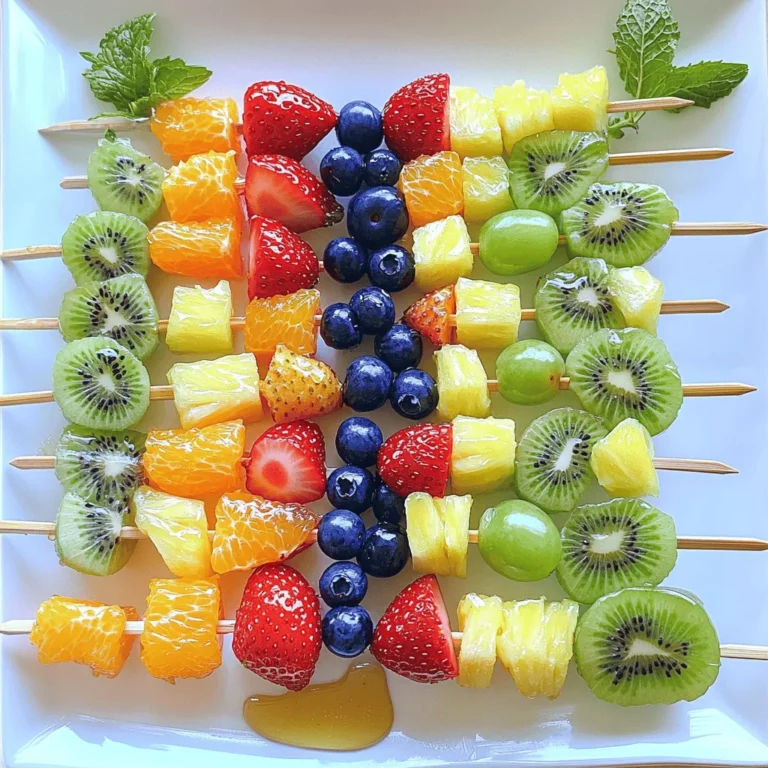
Rainbow Fruit Skewers Colorful and Delicious Treat
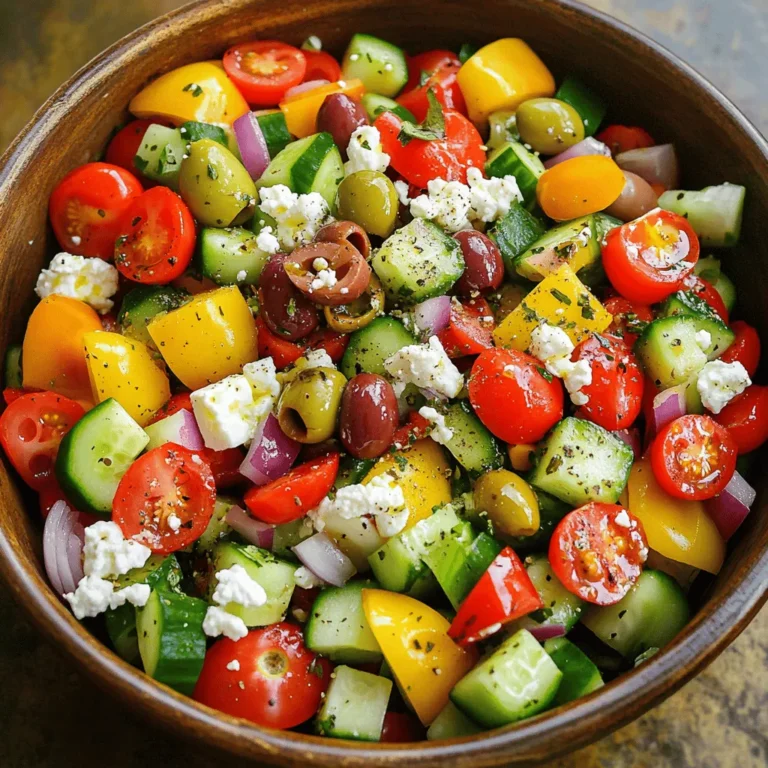
Easy Greek Salad Fresh and Flavorful Recipe Today
Garlic Butter Steak Bites Flavorful and Simple Recipe
Baked Parmesan Zucchini Fries Crispy and Flavorful Snack
Everything Bagel Cucumber Bites Fresh and Flavorful Snack
Spicy Sriracha Chicken Wraps Flavorful and Easy Meal
Page navigation
1
2
3
4
Next Page
Next
Home
Dinner
Appetizer
Desserts
Drinks
About
Contact
Privacy Policy
Toggle Menu Close
Search for:
Search

![- 1 cup frozen chopped spinach - 1 cup canned artichoke hearts - 1 cup cream cheese - 1/2 cup sour cream - 1/2 cup mayonnaise - 1 cup shredded mozzarella cheese - 1/2 cup freshly grated Parmesan cheese - 2 cloves garlic - 1 teaspoon onion powder - 1 teaspoon salt - 1/2 teaspoon black pepper - 1/4 teaspoon red pepper flakes (optional) When making Cheesy Spinach Artichoke Dip, I often choose frozen spinach. It stays fresh and is easy to use. You can thaw it, squeeze out extra water, and it’s ready to go! For artichokes, I look for high-quality canned ones. They add the right flavor and texture to the dish. - Benefits of using frozen spinach: Frozen spinach retains nutrients and is quick to prepare. You can find it year-round, making it a great choice. - Selecting quality canned artichoke hearts: Choose artichoke hearts that are tender and packed in water or brine. They should not have any off-flavors or smells. - Medium-sized baking dish - Mixing bowl - Hand mixer or whisk Having the right tools makes cooking easier. A medium-sized baking dish helps the dip bake evenly. A mixing bowl is perfect for blending the creamy base. A hand mixer or whisk helps create a smooth mix, making your dip perfect every time. For the full recipe, you can find detailed steps on how to prepare this delightful dip. - Preheat oven to 375°F (190°C) - Prepare ingredients and utensils Start by preheating your oven to 375°F (190°C). This step is key for getting that perfect bubbly dip. While the oven heats, gather all your ingredients. You will need a medium-sized baking dish and a mixing bowl. Having everything ready makes cooking fun and easy. - Combine cream cheese, sour cream, and mayonnaise - Add seasonings and mix well In your mixing bowl, combine 1 cup of softened cream cheese, 1/2 cup of sour cream, and 1/2 cup of mayonnaise. Use a hand mixer or a whisk to blend them until smooth. Next, add 2 minced garlic cloves, 1 teaspoon of onion powder, 1 teaspoon of salt, 1/2 teaspoon of black pepper, and 1/4 teaspoon of red pepper flakes if you want a little heat. Mix well to ensure all the seasonings are evenly spread. - Gently fold in spinach and artichoke hearts - Incorporate the cheeses for a cohesive mixture Now it’s time to add the stars of the dish! Gently fold in 1 cup of thawed and drained chopped spinach and 1 cup of coarsely chopped artichoke hearts. Be careful not to break the artichokes too much. Next, stir in 1 cup of shredded mozzarella cheese and 1/2 cup of freshly grated Parmesan cheese. Mix until everything is well combined. - Transfer mixture to baking dish - Bake for 25-30 minutes until bubbly Transfer your creamy mixture to the prepared baking dish. Spread it out evenly with a spatula so it cooks evenly. Pop it in your preheated oven and bake for about 25-30 minutes. Keep an eye on it until it is bubbly and the top turns golden brown. Your home will smell amazing! Once baked, let it cool for about 5 minutes before serving. For the full recipe, check the recipe section. To avoid a watery dip, always drain your spinach and artichokes well. If you skip this step, you risk a dip that's runny and hard to enjoy. Use a clean kitchen towel to squeeze out any extra moisture from the spinach. For the artichokes, press them gently with your hands or a spoon to remove excess liquid. This makes a big difference in texture. Using well-drained ingredients is key. When both the spinach and artichokes are dry, they blend into the creamy base better. This gives you a thick and luscious dip that holds up well when served. For the best dippers, think crispy and colorful. Tortilla chips are a classic choice. You can also use slices of warm baguette for a nice crunch. Fresh vegetable sticks, like carrots and bell peppers, add a healthy touch and a splash of color. Arrange these around the dip for a fun and inviting look. Creative plating ideas include using a large platter with various dippers. You can even add small bowls of olives or pickles for an extra zing. This not only makes it visually appealing but also allows guests to mix and match flavors. When reheating your cheesy dip, keep the texture in mind. The best way is to bake it again. Preheat your oven to 350°F (175°C). Place the dip in an oven-safe dish and cover with foil. Bake for about 15-20 minutes. This keeps it creamy and prevents it from drying out. If you're short on time, you can microwave it. Use a microwave-safe bowl and heat in short bursts, stirring in between. This method works, but be careful not to overheat. That can lead to a rubbery texture. For a delicious outcome, follow these tips and enjoy every creamy bite of your Cheesy Spinach Artichoke Dip! You can find the Full Recipe to make it yourself. {{image_4}} You can change the cheese in this dip. Try using sharp cheddar for a stronger flavor. It adds a nice twist. You can also substitute Greek yogurt for sour cream. This swap makes the dip lighter and adds some tang. Both options keep the dip creamy and delicious. Want some heat? Add diced jalapeños or a few drops of hot sauce. This will give your dip an extra kick. You can also make a chipotle version. Just blend in some chipotle peppers for a smoky flavor. These spicy versions pair well with crunchy chips. If you want a dairy-free option, use cashews. Soak them in water, then blend until smooth. This creates a creamy base without dairy. Also, look for vegan cheese to replace the regular cheese. There are many tasty options available now. These swaps keep your dip rich and flavorful. For the full recipe, check out the [Full Recipe]. To store leftovers of Cheesy Spinach Artichoke Dip, place it in an airtight container. This keeps the dip fresh and prevents it from drying out. It’s best to refrigerate within two hours of serving. The dip can stay good for about 3 to 4 days in the fridge. To maintain flavor and texture, re-cover the dip with plastic wrap. If you notice any separation, just stir it before serving. Always check for freshness before enjoying. The dip might lose some creaminess, but a quick stir can help revive it. You can freeze Cheesy Spinach Artichoke Dip for longer storage. Make sure it’s in a freezer-safe container. Leave some space at the top, as it may expand. The dip can last for up to 3 months in the freezer. To thaw, place it in the fridge overnight. Reheating is key to restoring its creamy texture. Warm it in the oven at 350°F (175°C) until hot. Stir it halfway through heating to ensure even warmth. Enjoy your dip just as delicious as the first time! You can store your Cheesy Spinach Artichoke Dip in the fridge for about 3 to 5 days. Be sure to place it in an airtight container. If you want to keep it longer, you can freeze it. In the freezer, it can last for about 2 to 3 months. Make sure to let it cool completely before freezing. Yes, you can prepare the dip ahead of time. Mix all the ingredients and store it in the fridge. It’s best to bake it right before serving. If you need to reheat it, just pop it back in the oven. Bake at 375°F until it’s hot and bubbly. You can serve this dip with many tasty dippers. Here are some fun ideas: - Crispy tortilla chips - Slices of crusty baguette - Colorful fresh vegetable sticks (like carrots, celery, and bell peppers) - Pita chips or crackers - Pretzel bites These options will make your dip even more enjoyable! For the full recipe, check out the details above. In this post, we explored how to make a delicious Cheesy Spinach Artichoke Dip. We covered the key ingredients, cooking tips, and variations to keep it fresh and exciting. Remember to choose quality items for the best taste. Enjoy this dip with your favorite dippers, and consider trying some of the fun variations we discussed. With the right steps, you’ll make a perfect dish every time. Get cooking and impress your friends with this tasty treat!](https://tastyrecipes.blog/wp-content/uploads/2025/07/7820fcde-8d38-4483-8b6d-8ba80a53cdb8-768x768.webp)
![To make this tasty mango black bean salsa, you will need: - 1 ripe mango, diced into small cubes - 1 cup canned black beans, thoroughly rinsed and drained - 1/2 medium red bell pepper, finely chopped - 1/2 medium red onion, finely chopped - 1 jalapeño pepper, seeds removed and minced (optional for a kick of heat) - 1/4 cup fresh cilantro, roughly chopped - Juice of 2 limes, freshly squeezed - 1 tablespoon extra-virgin olive oil - Sea salt and freshly ground black pepper to taste This mix of fresh and vibrant ingredients gives the salsa its fresh taste. Each bite bursts with flavor and color. You can make swaps if you can't find some ingredients. - Mango: Try peaches or pineapple for a different sweetness. - Black Beans: Kidney beans or pinto beans work well too. - Red Bell Pepper: Yellow or orange bell peppers can brighten your dish. - Red Onion: Use green onions for a milder flavor. - Jalapeño: If you want less heat, skip it or use a green bell pepper. - Cilantro: Parsley or basil can replace cilantro for a different herb taste. These substitutions still create a delicious salsa. This salsa is not just tasty; it's also good for you. - Calories: About 150 calories per serving - Protein: 6 grams from the beans - Fiber: 5 grams, helping digestion - Vitamin C: High from mango and lime - Fat: Low, with healthy fats from olive oil This salsa is a great choice for a healthy snack or a meal topper. Its bright flavors and nutrients can fit well into many diets. You can find the full recipe [here]. To make mango black bean salsa, start by gathering all your ingredients. You need one ripe mango, one cup of canned black beans, half a red bell pepper, half a red onion, and one jalapeño pepper. 1. First, dice the mango into small cubes. Make sure they are not too big. 2. Rinse and drain the black beans. This step removes excess salt and liquid. 3. Finely chop the red bell pepper and the red onion. Keep the pieces small for easy eating. 4. If you like heat, remove the seeds from the jalapeño and mince it finely. 5. Place all these ingredients into a large mixing bowl. When mixing your salsa, be gentle. You want to keep the mango cubes intact. After adding the chopped cilantro, lime juice, and olive oil, use a soft hand to toss everything. - Move your spatula from the bottom to the top. - Turn the bowl as you mix to ensure even distribution. - Avoid pressing down on the mango pieces, or they will turn mushy. Chilling your salsa enhances its taste. Once mixed, cover the bowl with plastic wrap or a lid. Place it in the refrigerator for at least 30 minutes. - This resting time allows the flavors to blend. - You can chill it longer if you wish. Just check it before serving. For the full recipe, refer to the [Full Recipe]. Enjoy your fresh and flavorful salsa! To find the best mangoes, look for ones that are slightly soft. Gently press the mango with your fingers. If it gives a little, it's ripe. The color can vary, so check for a sweet smell at the stem. This means it’s ready to eat. Avoid mangoes with dark spots or wrinkles. For the best taste, use fresh mangoes in your salsa. If you want more heat, add more jalapeño. Keep the seeds if you like it spicy. For less heat, use less jalapeño or remove all the seeds. You can also try adding a pinch of cayenne pepper to spice it up. Taste as you go to get the right balance. To boost flavor, try adding diced avocado or chopped green onions. Fresh mint or basil can add a unique twist. For a tangy kick, mix in a little cumin or smoked paprika. These small changes can make your salsa even more exciting. Experiment with different herbs to find your favorite mix. {{image_4}} You can mix in other fruits or veggies to make the salsa unique. Try adding diced pineapple for a sweet punch. Chopped avocado adds creaminess and a rich texture. You could also include diced cucumber for a refreshing crunch. Each fruit or vegetable gives a new taste and makes the salsa fun. Mango black bean salsa pairs well with many meats and seafood. Grilled chicken is a great choice, adding a smoky flavor. It also tastes amazing on grilled fish, like salmon or tilapia. If you like shrimp, try it with shrimp tacos. The salsa adds brightness and a burst of flavor to any dish. While lime juice and olive oil are classic, you can switch it up. Try adding a splash of orange juice for sweetness. A drizzle of balsamic vinegar gives a tangy twist. You can also season with cumin or smoked paprika for depth. Experimenting with different dressings and spices can create a salsa that fits your taste perfectly. For the full recipe, check out the Mango Black Bean Fiesta Salsa. To store leftover salsa, place it in an airtight container. Make sure the lid fits snugly. This keeps air out and helps the salsa stay fresh. You can store it in the fridge for up to three days. Just remember to give it a stir before serving again. This helps mix any ingredients that may have settled. Freezing salsa is a great way to keep it longer. Use a freezer-safe container or bag. Leave some space at the top, as the salsa will expand when it freezes. You can freeze it for up to three months. To defrost, place it in the fridge overnight. Stir it well before serving to make sure it's mixed. Fresh salsa can last in the fridge for about three days. If you see any mold or smell a sour odor, it’s time to toss it. If the salsa looks watery or has changed color, those are also signs it has spoiled. Always trust your senses! If it doesn’t look or smell right, don’t eat it. You can serve this salsa with many dishes. It pairs well with grilled chicken or fish. It also works great with tacos or as a dip with tortilla chips. You can even use it on top of salads for a fresh touch. The bright flavors of the salsa enhance any meal. The salsa lasts about 3 to 5 days in the fridge. Make sure to store it in an airtight container. The flavors may blend and taste even better after a day. However, the mango may become softer over time, so enjoy it fresh! Yes, you can make this salsa ahead of time. In fact, it tastes better if you let it chill for at least 30 minutes. This time helps the flavors mix well together. Just remember to store it in the fridge until you’re ready to serve. You can use other beans like pinto or kidney beans. These choices bring a different flavor and color. Chickpeas are also a fun option, adding a nice texture. Feel free to experiment and find your favorite bean combination! This blog post covered everything you need for Mango Black Bean Salsa. We explored ingredients, variations, and storage tips. You learned how to make salsa that shines in taste. Remember, fresh ingredients boost flavor. Adjust spiciness to fit your taste buds. Store leftovers well to keep it fresh. This salsa is perfect for parties or snacks. Now that you are equipped with this knowledge, it’s time to enjoy your delicious creation!](https://tastyrecipes.blog/wp-content/uploads/2025/07/4a4ed163-9ba9-4493-b9a6-82fb7ffab537-768x768.webp)
![To make the best chili lime grilled corn, you need simple ingredients. Each one adds its own flavor. Here’s what you will need: - Fresh corn - Olive oil and lime juice - Spices and seasonings - Cheese and herbs - Optional garnishes Fresh corn is key. It gives that sweet taste we love. Choose ears that feel firm and heavy. For the oil, use extra virgin olive oil for richness. The lime juice adds a bright tang that balances the sweetness. Next, we have spices. Chili powder brings heat, while smoked paprika adds a nice depth. Adjust the cayenne for extra spice if you like it hot. Salt and pepper are musts for flavor enhancement. For cheese, I suggest feta or cotija. Both add a creamy, salty kick. Fresh cilantro brings freshness and pairs well with the lime. Lastly, lime wedges are perfect for squeezing on top, enhancing each bite. Using good quality ingredients makes a big difference. They bring out the best in this dish. Check out the Full Recipe to see how they all come together! First, preheat your grill to medium-high heat. A good temperature is key for perfect grilled corn. Make sure it reaches about 400°F (200°C). This heat helps the corn cook evenly and develop a nice char. Remember, a clean grill makes a big difference. Scrub the grates before grilling to avoid sticking. Next, let's make the chili lime mixture. In a small bowl, mix together the following: - 3 tablespoons extra virgin olive oil - 2 tablespoons freshly squeezed lime juice - 1 teaspoon chili powder - 1/2 teaspoon smoked paprika - 1/4 teaspoon cayenne pepper (more or less, based on your taste) - Salt and freshly ground black pepper to taste Whisk these ingredients until they blend well. If you want a milder flavor, add less cayenne. For extra heat, add more chili powder or cayenne. Now, it’s time to grill the corn. Coat each ear of husked corn with the chili lime mixture. Use a brush or your hands to spread it evenly. This step ensures each bite bursts with flavor. Place the corn on the grill. Cook for 10 to 15 minutes. Turn the corn every few minutes. This helps it char evenly and creates a slight blistering. You’ll know it’s done when it’s tender and has a nice golden color. Once grilled, let the corn cool for a minute. It will be hot! Sprinkle crumbled feta cheese on top and add freshly chopped cilantro. Serve with lime wedges for that extra zing. Enjoy your delicious chili lime grilled corn! For the complete recipe, check [Full Recipe]. To take your Chili Lime Grilled Corn to the next level, think about adding spices. You can try garlic powder or onion powder for a savory kick. Also, fresh herbs like mint or dill can brighten the flavor. Always use fresh ingredients. Fresh corn tastes sweeter and has a better crunch. Fresh lime juice adds zing, while fresh herbs bring color and aroma. When serving the corn, place it on a nice platter. Arrange the ears with the ends pointing outward. This makes it look appealing. For garnishing, sprinkle extra cilantro on top. Adding lime wedges on the side invites guests to squeeze more lime on their corn. This little touch enhances the experience. Grilling corn can be fun, but safety is key. Use tongs to handle hot corn. This keeps your hands safe from burns. Always let the corn cool for a minute after grilling. This helps prevent burns. Avoid common mistakes like leaving corn unattended on the grill. Keep an eye on it for even cooking and to prevent charring. For the full recipe, check out Zesty Chili Lime Grilled Corn. {{image_4}} You can change the cheese in your chili lime grilled corn for fun. Cotija cheese gives a salty taste. It crumbles well and adds a nice texture. Feta cheese is a great choice too. It is creamy and tangy, which works well with the flavors. If you want to skip the dairy, try a vegan cheese. Many brands offer tasty options. Look for a cheese that crumbles like cotija. This way, you can enjoy the dish without dairy. Feel free to add more veggies to the grill. Bell peppers and zucchini are great choices. They char nicely and add color. You can also grill mushrooms for a meaty bite. For flavor twists, try different spices. Cumin adds warmth, while garlic powder gives a savory punch. You can even add a drizzle of hot sauce for a spicy kick. Each change lets you make this dish your own. For the full recipe, check out the Zesty Chili Lime Grilled Corn section. After grilling, let the corn cool. Wrap each ear in plastic wrap or foil. This keeps moisture in. Store the corn in the fridge for up to three days. When you want to eat it, reheat it safely. You can use the microwave or grill. If using the microwave, put it in for about 1-2 minutes. Turn it halfway through to heat evenly. On the grill, reheat for 5-7 minutes, turning until hot. To keep the corn fresh, always cover it tightly. This prevents it from drying out or soaking up other smells in your fridge. To freeze grilled corn, first let it cool completely. Then, cut the kernels off the cob for easier storage. Place the kernels in a freezer bag. Remove as much air as possible before sealing. This prevents freezer burn. You can also freeze whole cobs. Wrap them tightly in foil. Store them in the freezer for up to six months. When you’re ready to eat, just thaw in the fridge overnight. You can reheat them on the grill or microwave as needed. For the full recipe, check out the Zesty Chili Lime Grilled Corn section above. To add more heat, you can increase the cayenne pepper. Start with a half teaspoon. You can also add some diced jalapeños to the corn while grilling. Another great option is to sprinkle some hot sauce over the corn just before serving. This will give you a nice kick without losing the corn's flavor. Yes, you can use frozen corn. However, you should adjust the cooking time. Frozen corn will need a bit longer on the grill. Aim for about 15 to 20 minutes. Be sure to thaw the corn first for even cooking. Check for a nice char to know it's done. Chili lime grilled corn tastes great with many meals. It pairs well with grilled chicken or fish. You can also serve it alongside tacos for a fun twist. For a complete meal, try it with a fresh salad or a zesty rice dish. It adds a bright flavor to any summer feast. For the full recipe, check [Full Recipe]. In this post, we explored how to make delicious Chili Lime Grilled Corn. We covered all the ingredients you need, from fresh corn to spices. I shared step-by-step instructions to prepare the grill, create the chili lime mixture, and grill the corn perfectly. We also discussed tips for flavor enhancement and safe grilling practices. Lastly, we looked at variations and clever ways to store leftovers. Enjoy this simple and tasty recipe, and get ready to impress your friends and family with your grilling skills!](https://tastyrecipes.blog/wp-content/uploads/2025/07/1328f8b7-f19b-42e1-afe9-3b60000d97e2-768x768.webp)
![- 1 lb sirloin steak, cut into bite-sized pieces - 4 tablespoons unsalted butter (divided) - 4 cloves garlic, finely minced - 1 tablespoon fresh parsley, finely chopped - 1 teaspoon smoked paprika - 1 teaspoon sea salt - ½ teaspoon freshly ground black pepper - Optional: 1 tablespoon Worcestershire sauce (for an extra flavor boost) - Large skillet - Mixing bowl - Tongs or spatula Gather all the ingredients before you start. This makes cooking smooth and fun. The sirloin steak is the star. It is tender and full of flavor. The unsalted butter adds richness and helps the garlic shine. Fresh garlic gives a warm, aromatic touch to the dish. Fresh parsley not only adds color but also a bright taste. For seasonings, smoked paprika gives a subtle depth. Sea salt and black pepper enhance all the flavors. If you want, add Worcestershire sauce for a savory kick. You will need a large skillet to get that nice sear on the steak. A mixing bowl is perfect for seasoning the meat. Tongs or a spatula help in flipping the steak bites easily. Follow the Full Recipe for exact steps to create this dish. You will love how simple and flavorful it is! - Patting the steak bites dry First, take your steak and pat it dry with paper towels. This helps the meat sear better. A dry surface makes a nice crust, adding flavor. - Seasoning the steak with spices Next, place the steak pieces in a bowl. Add smoked paprika, sea salt, and black pepper. Toss everything together well. This gives the steak great taste all around. - Heating the skillet Heat a large skillet on medium-high heat. Add two tablespoons of butter when it's hot. Wait for the butter to melt and bubble. This shows it is ready for cooking. - Searing the steak bites Carefully add the seasoned steak to the skillet. Make sure not to overcrowd it. Cook each side for about 2-3 minutes. This timing helps create that golden-brown crust we all want. - Sautéing garlic in butter After cooking the steak, remove it and let it rest. In the same skillet, lower the heat to medium. Add the remaining butter and minced garlic. Stir for about a minute until the garlic smells good but does not brown. - Combining steak with the garlic butter If you like, add Worcestershire sauce to the garlic butter. Then, return the steak bites to the skillet. Toss to coat them in that delicious sauce. Cook for another minute to blend the flavors. This method creates a rich and tasty dish. For the full recipe and detailed steps, check out the [Full Recipe]. To get a great sear on your steak bites, start by drying them well. Use a paper towel to remove moisture. This helps in forming a nice crust. If the steak is wet, it will steam, not sear. Cook the steak in batches. Overcrowding the pan lowers the heat. This can lead to uneven cooking. Worcestershire sauce adds depth. Just a tablespoon can boost the taste. Mix it in with the garlic butter before tossing the steak bites. This gives a savory kick. Adjust seasonings to your liking. Taste the steak bites after cooking. If you want more flavor, sprinkle more salt or pepper. Serve garlic butter steak bites on a wooden board or white platter. This makes the dish look appealing. Drizzle leftover garlic butter over the bites for richness. Garnish with fresh parsley for color. For fun, offer toothpicks for easy eating. This makes it perfect for parties or casual dinners. You can find the full recipe for garlic butter steak bites [here](Full Recipe). {{image_4}} You can use different cuts. Filet mignon brings tenderness. Ribeye adds rich flavor. Both cuts work well. Choose what you like best. Each cut offers a unique taste. Adjust cooking times as needed. Add fresh herbs for extra flavor. Thyme and rosemary make great choices. They add a lovely aroma. You can also spice things up. Red pepper flakes add heat. Just a pinch can change the dish. Mix and match these elements for fun! Pair steak bites with tasty sides. Mashed potatoes are a classic choice. They soak up the garlic butter. Steamed veggies add great color. For a fun twist, create a platter. Use toothpicks for easy serving. Guests will love this idea! Check out the Full Recipe for more tips. To keep your garlic butter steak bites fresh, store them in an airtight container. This helps lock in flavor. Place the container in the fridge. They will last for 3 to 4 days. If you want to maintain the taste, use them up quickly. When reheating steak bites, the best method is to use a skillet. Heat a small amount of butter over medium heat. Add the steak bites and cook for 2 to 3 minutes. This warms them up nicely. Avoid using a microwave, as it can dry out the meat. If you must use the microwave, cover them with a damp paper towel to help retain moisture. Yes, you can freeze garlic butter steak bites! To do this, let them cool completely first. Then, place them in a freezer-safe bag. Make sure to remove as much air as possible. They will stay good for about 2 to 3 months. When ready to eat, thaw the steak bites in the fridge overnight. To reheat, follow the skillet method above for best results. The best cut for steak bites is sirloin. It is tender and full of flavor. Other good options include filet mignon and ribeye. These cuts cook quickly and are easy to chew. They also soak up the garlic butter well, making each bite tasty. Yes, you can make garlic butter steak bites in the oven. Preheat the oven to 400°F. Place the seasoned steak bites on a baking sheet. Bake for about 10 to 15 minutes. Use a meat thermometer to check for doneness. This method gives a different texture but is simple and effective. To avoid drying out well-done steak bites, use low heat. Cook them slowly for longer. Keep an eye on the temperature. Use a meat thermometer to check for doneness. You can also marinate the steak before cooking. This adds moisture and flavor, making it more enjoyable. Garlic butter steak bites pair well with many sides. You can serve them with mashed potatoes, rice, or roasted vegetables. Fresh salads also work well. For a fun twist, try toothpicks for easy serving. This makes them great for parties or gatherings. Store leftover steak bites in an airtight container. Refrigerate them for up to three days. To reheat, use a skillet on low heat. This helps keep them tender. You can also freeze them for up to three months. Just thaw in the fridge before reheating for the best results. In this post, I covered how to make delicious garlic butter steak bites. We discussed the main ingredients like sirloin steak and garlic, along with important seasonings and tools needed. I provided step-by-step cooking instructions and shared tips to achieve the perfect sear. You can also explore variations and learn how to store and reheat leftovers. Whether you want a classic dish or something new, these steak bites offer endless possibilities. Enjoy cooking and impressing your friends with this tasty treat!](https://tastyrecipes.blog/wp-content/uploads/2025/07/a4bd9f0a-8bdd-4218-ae17-6a9e9da47aa7-768x768.webp)
![- 3 medium zucchinis - 1 cup whole wheat breadcrumbs - 1 cup freshly grated Parmesan cheese - 1 teaspoon garlic powder - 1 teaspoon Italian seasoning - 1 teaspoon smoked paprika - Salt and freshly cracked pepper - 2 large eggs - Olive oil spray These ingredients come together to create a snack that is both crispy and tasty. Zucchini is a great vegetable. It has a mild taste and is low in calories. Whole wheat breadcrumbs add crunch and fiber. Parmesan cheese gives a rich flavor that everyone loves. The spices like garlic powder and Italian seasoning add more depth to the dish. Smoked paprika brings a nice smokiness. Don't forget the salt and pepper to enhance all the flavors. - Extra Parmesan cheese - Fresh herbs (like parsley or basil) You can add extra Parmesan cheese on top for a cheesy kick. Fresh herbs like parsley or basil also make a great garnish. They add a fresh taste and make your dish look pretty. For the full recipe, check out the instructions on how to make these delicious Baked Parmesan Zucchini Fries. 1. Preheat your oven to 425°F (220°C). This temperature helps the fries get crispy. 2. Line a baking sheet with parchment paper. This keeps the fries from sticking and makes cleanup easy. 1. In a large bowl, mix together the breadcrumbs, grated Parmesan cheese, garlic powder, Italian seasoning, smoked paprika, salt, and pepper. Stir until all is combined. 2. In another bowl, whisk the eggs until they are light and frothy. This will act as your egg wash. 3. Take each zucchini fry and dip it into the egg wash. Make sure it is fully coated, letting the extra egg drip off. 4. Roll the egg-coated fry in the breadcrumb mix. Press gently to help the coating stick well. 1. Place the coated zucchini fries on the baking sheet in a single layer. Make sure they are not crowded. 2. Lightly spray the tops with olive oil. This helps them get that perfect crispy texture. 3. Bake in the oven for about 20-25 minutes. Turn the fries halfway through to ensure they cook evenly. 4. They should be golden brown and crispy when ready. Enjoy your fries hot, straight from the oven. For the full recipe, check the instructions provided above. To make your zucchini fries nice and crispy, use whole wheat breadcrumbs. This adds a great crunch. Before baking, lightly spray the fries with olive oil. This simple step helps them crisp up perfectly. These zucchini fries taste amazing with marinara sauce. The sauce adds a nice tangy flavor. You can also sprinkle fresh herbs on top. Fresh herbs like parsley or basil enhance the dish’s taste and look. One big mistake is overcrowding the baking sheet. If the fries are too close, they won’t cook evenly. Make sure to leave space between each fry. Another mistake is not preheating the oven properly. A hot oven ensures your fries bake correctly and get that golden finish. {{image_4}} You can easily change the flavor of your zucchini fries. Try adding different seasonings to the breadcrumb mix. Cajun spices add heat and zest. For a spicy kick, sprinkle in some cayenne pepper. If you want something milder, use Italian herbs. You can also switch up the cheese. Instead of Parmesan, try cheddar for a sharp taste. Mozzarella can give a nice gooey texture. Each option brings a unique twist to this tasty snack. If you need a gluten-free option, you can make simple swaps. Instead of regular breadcrumbs, use ground almonds. They provide a nice crunch and great flavor. Gluten-free breadcrumbs work well too. Just ensure they are finely crushed for the best coating. This way, everyone can enjoy these zucchini fries without worry. You can expand the veggie fun by adding other vegetables. Eggplant works well and has a similar texture. Sweet potato adds a hint of sweetness that pairs nicely with the cheese. Cut them into fry shapes just like the zucchini. Coat and bake them the same way. This gives you a colorful plate and more flavors to enjoy. For the full recipe, check out the detailed instructions above. Enjoy the process of trying different flavors and veggies! To store baked zucchini fries in the fridge, place them in an airtight container. This keeps them fresh and tasty. Enjoy the fries within 3 days for the best flavor. Make sure they cool down before sealing. This prevents steam from making them soggy. To reheat zucchini fries while keeping them crispy, use an oven or air fryer. Preheat your oven to 375°F (190°C). Place the fries on a baking sheet. Bake for about 10 minutes, or until hot. If using an air fryer, set it to 350°F (175°C) for 5 to 7 minutes. This helps restore their crunch. Yes, you can freeze zucchini fries! Freezing them is easy. First, let the fries cool completely. Then, spread them out on a baking sheet. Freeze for about 1 hour. Once frozen, transfer them to a freezer bag. Label the bag with the date. Use within 2 months for the best quality. To reuse, bake from frozen at 425°F (220°C) for about 25-30 minutes. This keeps them crispy and tasty. For the full recipe and more tips, check out the [Full Recipe]. To make zucchini fries crispy, you can follow these tips: - Use whole wheat breadcrumbs: They provide a nice crunch. - Lightly spray with olive oil: This helps achieve that golden, crispy finish. - Do not overcrowd the baking sheet: Give them space to cook evenly. - Turn them halfway: This ensures all sides get nice and crispy. These steps will help you enjoy perfectly crunchy zucchini fries each time. Yes, you can bake zucchini fries without breadcrumbs. Here are some alternatives: - Almond flour or ground nuts: These add crunch without gluten. - Cornmeal: It offers a different texture and flavor. - Crushed cornflakes: They create a very crispy coating. These options can change the texture while keeping your fries tasty. Zucchini is low in calories and full of nutrients. Here are some benefits: - High in fiber: This helps with digestion. - Rich in vitamins: It contains vitamin C and vitamin A. - Hydrating: Zucchini has a high water content. - Low in carbs: Great for low-carb diets. Including zucchini in your meals can enhance your diet. Baked Parmesan zucchini fries last about 3-4 days in the fridge. Here’s how to store them: - Keep in an airtight container: This helps maintain freshness. - Look for spoilage signs: Check for any off smells or sliminess. When stored properly, you can enjoy your delicious fries for days! In this blog post, we explored how to make delicious baked zucchini fries. We covered the key ingredients and shared step-by-step instructions to guide you through the process. I also provided tips for getting that perfect crunch and ways to vary the recipe. Remember to store leftovers properly, and feel free to experiment with flavors. Baked zucchini fries are a tasty and healthy snack you can enjoy anytime. With this guide, you have everything you need for a successful cooking experience. Now it's time to enjoy your creation!](https://tastyrecipes.blog/wp-content/uploads/2025/07/a3f0f870-b1ec-4797-bd27-3c0957e6e1bf-768x768.webp)