Skip to content
About
Contact
Cookie Policy
Copyright Policy
Disclaimer
Search
Home
Dinner
Appetizer
Desserts
Drinks
About
Contact
Privacy Policy
Toggle Menu
Home
/
Appetizer
- Page 3
Appetizer
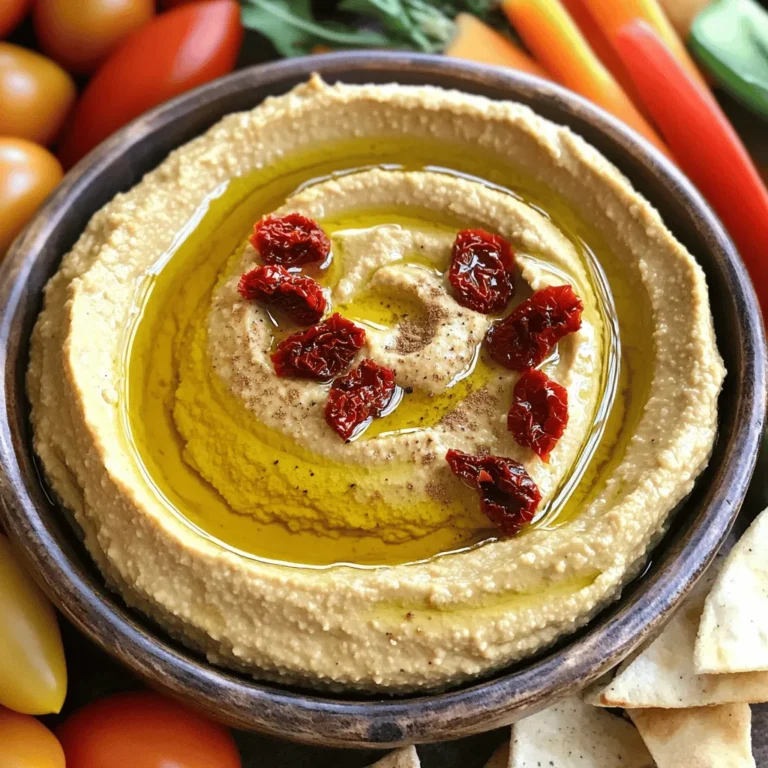
Sun Dried Tomato Hummus Easy and Flavorful Recipe
Crispy Baked Chicken Tenders Simple and Delicious Meal
Garlic Roasted Brussels Sprouts Healthy and Simple Side
Simple Chicken Quesadillas Quick and Tasty Recipe
Creamy Spinach Artichoke Dip Delightful Party Snack
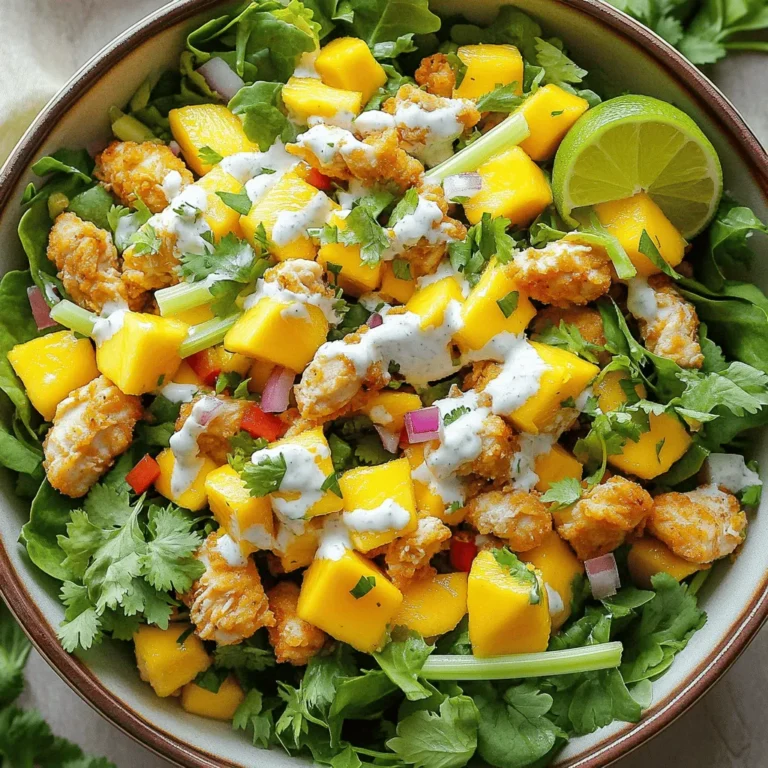
Easy Chicken Salad Tasty Recipe for Any Meal
Crispy Chickpea Nuggets Healthy and Flavorful Snack
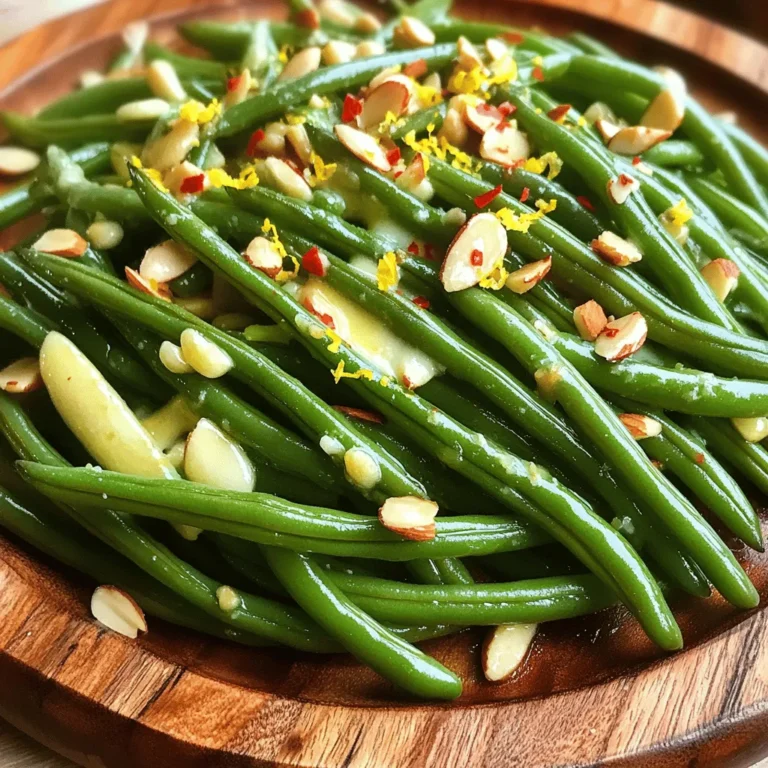
Garlic Butter Green Beans Fresh and Flavorful Recipe
Oven Roasted Sweet Potatoes Simple Flavorful Delight
Classic Deviled Eggs Flavorful Party Favorite Recipe
Page navigation
Previous Page
Previous
1
2
3
4
Next Page
Next
Home
Dinner
Appetizer
Desserts
Drinks
About
Contact
Privacy Policy
Toggle Menu Close
Search for:
Search

![For my crispy baked chicken tenders, you need: - 1 lb chicken breast tenders - 1 cup whole wheat breadcrumbs - 1/2 cup grated Parmesan cheese - 1 teaspoon garlic powder - 1 teaspoon onion powder - 1 teaspoon smoked paprika - 1/2 teaspoon black pepper - 1/2 teaspoon salt - 2 large eggs - 2 tablespoons Dijon mustard - 1 tablespoon olive oil These ingredients make the tenders crispy and tasty. You can add extra flavor with these optional seasonings: - 1 teaspoon cayenne pepper for heat - 1 teaspoon dried oregano for a herby taste - 1 teaspoon Italian seasoning for more depth Feel free to mix and match to suit your taste! Each serving of these chicken tenders has: - Calories: 320 - Protein: 30g - Carbohydrates: 20g - Fat: 15g These chicken tenders are a healthy choice. For the full recipe, check out the cooking guide! To start, preheat your oven to 425°F (220°C). This high heat helps to create a crispy outer layer. Next, line a baking sheet with parchment paper. This step keeps the tenders from sticking and helps them cook evenly. In a big bowl, mix together one cup of whole wheat breadcrumbs, half a cup of grated Parmesan cheese, one teaspoon of garlic powder, one teaspoon of onion powder, one teaspoon of smoked paprika, half a teaspoon of black pepper, and half a teaspoon of salt. Set this aside. Now, crack two large eggs into another bowl. Whisk them with two tablespoons of Dijon mustard until smooth. This mixture will help the breadcrumbs stick to the chicken. Take each chicken tender and dip it into the egg mixture. Make sure it gets fully coated. Then, shake off the extra liquid and roll it in the breadcrumb mix. Press gently so the crumbs stick well. Place the coated chicken tenders on the baking sheet with space between them. To get that extra crispy texture, drizzle one tablespoon of olive oil over the top. Bake the tenders for 15 to 20 minutes. Flip them halfway to ensure even browning. They are ready when they are golden brown and reach an internal temperature of 165°F (74°C). To achieve the best crispiness, use whole wheat breadcrumbs. They provide a great texture. Don’t skip the olive oil drizzle; it helps the tenders brown nicely. Also, make sure the chicken tenders are not crowded on the baking sheet. Proper air flow is key for crispiness. If you want an even crunchier finish, try broiling the tenders for the last 2-3 minutes. Just watch them closely to prevent burning! Imagine your kitchen filled with rich aromas while those chicken tenders bake. Picture the golden-brown crust forming on each tender. As they cook, you’ll see the crispiness develop. When they are finished, let them rest for a few minutes. This time lets the juices settle in, making each bite juicy and tender. For a complete recipe, click on [Full Recipe]. When making crispy baked chicken tenders, avoid these common mistakes: - Not drying the chicken: Wet chicken will not crisp up well. Pat it dry with paper towels. - Skipping the egg wash: The egg mixture helps the breadcrumbs stick. Don't skip this step. - Overcrowding the baking sheet: Space out the tenders to allow hot air to circulate. This helps them cook evenly. - Not flipping the tenders: Flip them halfway through baking for an even golden color. To ensure your chicken is perfectly cooked: - Use a meat thermometer: Check the internal temperature. It should reach 165°F (74°C). - Choose even-sized tenders: This helps them cook at the same rate. - Avoid opening the oven too often: Each time you open the door, the heat escapes. Keep it closed for even cooking. Dipping sauces can elevate your chicken tenders. Here are a few favorites: - Honey mustard: A sweet and tangy option. - Ranch dressing: Creamy and herby, it pairs well with chicken. - Buffalo sauce: For those who like heat, this spicy option is perfect. - Barbecue sauce: A classic choice that adds a smoky flavor. For a full recipe, check the [Full Recipe] section and enjoy the process of making these tasty chicken tenders! {{image_4}} If you like heat, try adding spices. You can mix cayenne pepper or chili powder into the breadcrumb mix. This adds a kick to the crispy coating. You can also use hot sauce in the egg mixture. Just a few drops can spice things up nicely. For a gluten-free version, swap whole wheat breadcrumbs for gluten-free ones. You can use crushed cornflakes or almond flour. Both options give a tasty crunch. Ensure all other ingredients are gluten-free, too. This way, everyone can enjoy these tenders. Experiment with different coatings to keep things exciting. Try using crushed potato chips or panko breadcrumbs for a lighter texture. You can also mix herbs like Italian seasoning or dried basil into the coating. Each change can give a new flavor twist. For the full recipe, check out the details above. After enjoying your crispy baked chicken tenders, you may have some left. To store them, let the tenders cool down first. Place them in an airtight container. This keeps them fresh and safe. You can keep them in the fridge for up to three days. If you want to enjoy them later, consider freezing them. Reheating chicken tenders can be tricky. You want them crispy, not soggy. To do this, heat your oven to 375°F (190°C). Place the tenders on a baking sheet lined with parchment paper. Bake for about 10-15 minutes. Flip them halfway through for even crispiness. You can also use an air fryer for a quick and crunchy option. Freezing is a great way to keep your chicken tenders for longer. First, let them cool completely. Next, place them in a single layer on a baking sheet and freeze for 1-2 hours. Once frozen, transfer them to a freezer-safe bag or container. They can last up to three months in the freezer. When you're ready to eat, just reheat as mentioned above. Enjoy your delicious meal anytime! Crispy baked chicken tenders take about 15 to 20 minutes to bake. I recommend setting your oven to 425°F (220°C) for the best results. Thin tenders cook faster, while thicker ones may need a bit more time. Always check for a golden brown color and ensure the internal temperature reaches 165°F (74°C). This way, you know they are both safe and tasty. Yes, you can use frozen chicken tenders! Just remember to thaw them first. It’s best to let them sit in the fridge overnight. If you're in a hurry, you can use the microwave. Once thawed, follow the same steps as if you were using fresh tenders. Adjust your baking time if needed, as they may require a few extra minutes to cook through. Crispy baked chicken tenders pair well with many sides. Here are some ideas: - Fresh salad with mixed greens - Steamed broccoli or green beans - Sweet potato fries - Classic coleslaw - Macaroni and cheese - Dipping sauces like honey mustard or ranch These sides make your meal balanced and more fun. For a complete recipe, check the [Full Recipe]. In this blog post, we explored the essential ingredients for chicken tenders and how to cook them perfectly. We covered tips to ensure a crispy finish and shared common mistakes to avoid. We also looked at tasty variations, storage info, and answered FAQs. Perfect chicken tenders are within your reach. With a few tricks, you can impress anyone. Enjoy your cooking and the delicious results!](https://tastyrecipes.blog/wp-content/uploads/2025/06/fa7849e2-4dbe-40b9-85b5-9d4524545ebb-768x768.webp)
![- 1 pound Brussels sprouts, trimmed and halved - 4 cloves garlic, finely minced - 3 tablespoons extra virgin olive oil - Zest of 1 lemon - 1 tablespoon balsamic vinegar - 1 teaspoon smoked paprika - Sea salt and freshly cracked black pepper to taste - 2 tablespoons grated Parmesan cheese (optional) Each serving has about 150 calories, 10 grams of fat, 4 grams of protein, and 12 grams of carbohydrates. This dish is low in calories but high in flavor. You get healthy fats from the olive oil and protein from the optional cheese. Brussels sprouts also pack vitamins and minerals, making them a great choice. - Oven - Baking sheet - Mixing bowl - Parchment paper 1. Preheat your oven to 400°F (200°C). This heat helps the sprouts get crispy. 2. Line a baking sheet with parchment paper for easy cleanup. 3. In a large mixing bowl, add the halved Brussels sprouts and minced garlic. 4. Pour in the extra virgin olive oil and balsamic vinegar. 5. Add the lemon zest, smoked paprika, sea salt, and black pepper. 6. Toss everything well to coat each sprout with the flavors. 1. Spread the seasoned Brussels sprouts on the baking sheet in a single layer. 2. This spacing is key for even roasting and browning. 3. Roast in the oven for 25-30 minutes. 4. Toss the sprouts halfway through for a golden color all around. 1. If you choose to add Parmesan cheese, sprinkle it on during the last five minutes. 2. This makes a tasty, cheesy crust on top of the sprouts. 3. For serving, place them in a rustic bowl. 4. Garnish with extra lemon zest and Parmesan for a beautiful look. For the full recipe, check out the details above. To get the best roast, spread the Brussels sprouts out evenly on the baking sheet. This helps them cook all the way through. If they are too close, they will steam instead of roast. Keep them crispy by tossing them halfway through. This way, they get golden brown on all sides. Add more spices to boost flavor. You can try a pinch of cayenne for heat or some thyme for an earthy taste. Fresh herbs like parsley can also add a nice touch at the end. For garnishes, try pomegranate seeds for a pop of color and sweetness. You can cook Brussels sprouts in different ways. Air frying gives them a great crunch without too much oil. Sautéing them on the stovetop is quick and simple too. If you follow a vegan or gluten-free diet, this recipe fits your needs. Just skip the Parmesan cheese, and you’re all set! For more details, check out the Full Recipe. {{image_4}} You can make garlic roasted Brussels sprouts even better with some fun twists. Adding nuts or seeds brings a great crunch. Try slivered almonds or pumpkin seeds. They add texture and healthy fats. Using different vinegars or citrus zests can also change the taste. Swap balsamic for apple cider vinegar for a fruitier note. Or, try orange zest instead of lemon for a sweet twist. These small changes can brighten the dish. Fresh herbs can bring a new flavor to your Brussels sprouts. In spring, add fresh dill or parsley. In fall, try thyme or rosemary for a cozy taste. They make the dish feel bright and lively. You can also adapt garlic roasted Brussels sprouts for holiday meals. Add nutmeg or cinnamon for warmth. This creates a festive flavor that fits right in with holiday dishes. If you can’t find Brussels sprouts, don’t worry! You can use broccoli or cauliflower instead. Both roast well and taste great with garlic. For cheese lovers, there are many options. If you want a dairy-free choice, use nutritional yeast. It gives a cheesy flavor without the dairy. You could also try feta or goat cheese for a tangy taste. Each option can add a unique twist to your dish. For the full recipe, check out the [Full Recipe]. To store your roasted Brussels sprouts, let them cool first. Place them in an airtight container. This keeps them fresh and tasty. Make sure to refrigerate them within two hours of cooking. They will last for about three to four days. For best flavor and texture, eat them within this time. When reheating Brussels sprouts, avoid sogginess. The best way is to use the oven. Preheat your oven to 350°F (175°C). Spread the sprouts on a baking sheet. Heat for about 10 to 15 minutes. This keeps them crispy. If you use a microwave, they may become soft. If you must use the microwave, heat for a short time. Check them often to make sure they do not overcook. You can freeze roasted Brussels sprouts, but they may lose some texture. First, let them cool completely. Then, place them in a freezer-safe bag or container. Remove as much air as possible. They can last up to three months in the freezer. To thaw, place them in the refrigerator overnight. Reheat them in the oven for the best result. This helps keep them crispy and delicious. If you follow these tips, your garlic roasted Brussels sprouts will stay tasty! For the full recipe, check the earlier section. How long do Brussels sprouts last in the fridge? Brussels sprouts can last about 3 to 5 days in the fridge. Make sure to store them in a cool, dry place. Keep them in a plastic bag or a container with a lid. This helps them stay fresh longer. Can I prepare the dish ahead of time? Yes, you can prep Brussels sprouts a day in advance. Trim and halve them, then store in the fridge. Mix the spices and oil in a bowl. Just add them when you are ready to roast. What's the best way to trim Brussels sprouts? To trim Brussels sprouts, slice off the tough stem end. Remove any yellow or damaged leaves. Halve each sprout to help them cook evenly and get nice and crispy. How do I know when the Brussels sprouts are done roasting? Brussels sprouts are done when they are golden brown and tender. You can poke them with a fork. They should feel soft but still have some bite. Toss them halfway through roasting for even cooking. Can I make this recipe without garlic? Yes, you can make this dish without garlic. While garlic adds great flavor, you can use onion powder or omit it entirely. The dish will still taste delicious. What can I serve with garlic roasted Brussels sprouts? Garlic roasted Brussels sprouts pair well with many dishes. Try serving them with grilled chicken, steak, or fish. They also work great alongside pasta or quinoa. For a complete meal, add a fresh salad. Check the Full Recipe for more ideas! In this post, I covered how to make garlic roasted Brussels sprouts. You learned about the key ingredients, cooking steps, and tips for the perfect roast. I shared ideas for variations and storage methods to keep the dish fresh. Remember, the right seasoning and techniques can elevate your sprouts. Now, with this knowledge, you can create a tasty dish that impresses everyone at your table. Enjoy experimenting and make this recipe your own!](https://tastyrecipes.blog/wp-content/uploads/2025/06/db887fd4-a515-4e67-9712-01546e649da1-768x768.webp)


![- 4 medium sweet potatoes, peeled and diced into 1-inch cubes - 3 tablespoons extra virgin olive oil - 1 teaspoon garlic powder - 1 teaspoon onion powder - 1 teaspoon smoked paprika - ½ teaspoon cayenne pepper (optional) - 2 teaspoons dried rosemary - 2 teaspoons dried thyme - Salt and freshly cracked black pepper to taste - Fresh parsley, finely chopped, for garnish - Additional spices or herbs - Toppings such as feta cheese or spicy aioli When I make oven-roasted sweet potatoes, I always start with fresh, vibrant ingredients. The sweet potatoes should feel firm and smooth. Peeling them makes the skin soft and easy to eat. I like to cut them into 1-inch cubes. This size cooks evenly and gives a nice texture. I use extra virgin olive oil for its rich flavor. It helps the spices stick and adds a bit of healthy fat. The spices are where the fun begins. Garlic powder and onion powder give depth to the taste. Smoked paprika adds warmth and a hint of smokiness. If you like heat, cayenne pepper is great. Just adjust how much you use based on how spicy you want it. Rosemary and thyme add a wonderful herbal note. Finally, salt and black pepper bring all the flavors together. For a twist, you can add extra spices or herbs. Try some cumin for an earthy note or chili powder for more heat. Toppings can also change the dish. Crumbled feta cheese adds creaminess. Spicy aioli gives a zesty kick. This recipe is all about personal taste. Feel free to mix and match to find your favorite blend. Check out the full recipe for a detailed guide on making these delightful sweet potatoes! To start, gather your sweet potatoes. You need four medium ones. First, wash them under cold water to remove any dirt. Next, peel off the skin using a vegetable peeler. Be sure to remove all the skin for the best taste. After peeling, cut each sweet potato into 1-inch cubes. Aim for even sizes. This helps them cook evenly. Now it’s time to mix! In a bowl, add the sweet potato cubes. Then, pour in three tablespoons of extra virgin olive oil. This oil adds great flavor and helps them crisp up. Next, add your spices. Sprinkle one teaspoon each of garlic powder and onion powder. Add one teaspoon of smoked paprika and optional cayenne pepper for heat. Finish with two teaspoons each of dried rosemary and dried thyme. Don’t forget to add salt and black pepper to taste. Using a large spoon or spatula, mix it all together. Make sure every cube is covered in oil and spices. This will make each bite tasty! Preheat your oven to 425°F (220°C). While the oven heats, line a large baking sheet with parchment paper. This helps with cleanup later. Spread the seasoned sweet potatoes in a single layer on the baking sheet. Avoid overlapping to ensure they roast correctly. Put the baking sheet in the oven for 25 to 30 minutes. Halfway through, flip the sweet potatoes using a spatula. This step ensures they cook evenly and get that nice golden-brown color. Once they are done roasting, take them out and let them cool for a few minutes. This cooling time allows the flavors to settle. Before you serve, sprinkle chopped parsley on top for a fresh touch. For the complete recipe, check the [Full Recipe]. Choose sweet potatoes that feel firm and heavy. Look for skin that is smooth and free of blemishes. Fresh sweet potatoes should have a vibrant color, whether orange or purple. If you can, buy organic sweet potatoes. Organic options often have better flavor and fewer chemicals. Conventional sweet potatoes can be just as tasty if you wash them well before cooking. To get crispy sweet potatoes, space them out on the baking sheet. If they are too close, they will steam instead of roast. Keep them in a single layer. This allows heat to circulate, giving them that nice crunch. If you want extra crispiness, try broiling them for the last few minutes. Just watch them closely to avoid burning. You can play with flavors by adding different herbs and spices. Try adding cumin for a warm taste or chili powder for a kick. For a fresh twist, mix in some lemon zest or lime juice. Adjust the spices to fit your taste. If you like it spicy, add more cayenne pepper. If you prefer milder flavors, skip it altogether. Remember, cooking should be fun and reflect your taste! For the full recipe, check the link. {{image_4}} You can mix sweet potatoes with other root veggies. Try carrots, parsnips, or beets. This mix adds various colors and flavors. Each root vegetable has its own taste and texture. Roasting them together creates a lovely medley. Just cut them into the same size. This way, they cook evenly. You can spice up your sweet potatoes with different flavors. For an Asian twist, try soy sauce, ginger, and sesame oil. These flavors give a fresh taste. For a southwestern kick, use cumin, chili powder, or lime juice. Each blend brings a new vibe to your dish. Feel free to experiment and find your favorite combo. Sweet toppings can make your sweet potatoes even better. Drizzle maple syrup or honey over them after roasting. This adds a lovely sweetness that contrasts with the savory spices. You can also top them with yogurt or nuts for crunch. This balance of sweet and savory makes each bite a delight. For the full recipe, visit the [Full Recipe]. To keep your oven-roasted sweet potatoes fresh, use airtight containers. Glass or plastic containers work well. Make sure they are completely cool before sealing. This step prevents moisture buildup, which can lead to sogginess. Store them in the fridge for up to four days. To enjoy crispy sweet potatoes again, use an oven or an air fryer. Preheat your oven to 375°F (190°C). Spread sweet potatoes on a baking sheet. Heat for about 10-15 minutes. Flip them halfway to maintain that crunch. If using an air fryer, set it to 350°F (175°C) for about 5-7 minutes. This method keeps them tasty and crispy. To freeze roasted sweet potatoes, let them cool completely first. Spread them in a single layer on a baking sheet. Freeze for a few hours until firm, then transfer them to freezer bags. Remove as much air as possible to prevent freezer burn. When ready to enjoy, thaw them in the fridge overnight. Reheat as mentioned above for the best taste. Oven-roasted sweet potatoes last about 3 to 5 days in the fridge. Store them in an airtight container to keep them fresh. If you want to enjoy them longer, consider freezing them. Make sure they cool down before you pack them. This keeps moisture from making them soggy. Yes, you can make this recipe in advance. You can prep the sweet potatoes a day ahead. Peel and cube them, then toss with the oil and spices. Store the mixture in the fridge until you are ready to roast. This way, you save time when you need it most. Oven-roasted sweet potatoes pair well with many dishes. They go great with grilled chicken or fish. You can also serve them with a hearty salad or rice dishes. For a vegan meal, try them with black beans or quinoa. Each option enhances their sweet flavor and adds more nutrition. Oven-roasted sweet potatoes offer a tasty, healthy side dish. We explored ingredients, prepping, and roasting steps. You learned how to customize flavors and achieve crispiness. Don't forget to store leftovers properly and reheat them for the best taste. Whether you enjoy them sweet or savory, sweet potatoes can fit many meals. Try new spices to make this dish your own. Enjoy your cooking journey with these versatile gems!](https://tastyrecipes.blog/wp-content/uploads/2025/06/7fb1c4b9-3d60-47e5-ad0f-e22ad726ecbf-768x768.webp)