Skip to content
About
Contact
Cookie Policy
Copyright Policy
Disclaimer
Search
Home
Dinner
Appetizer
Desserts
Drinks
About
Contact
Privacy Policy
Toggle Menu
Home
/
Dinner
- Page 2
Dinner
Garlic Roasted Brussels Sprouts Flavorful Easy Recipe
Savory Chicken Enchilada Casserole Easy Family Meal
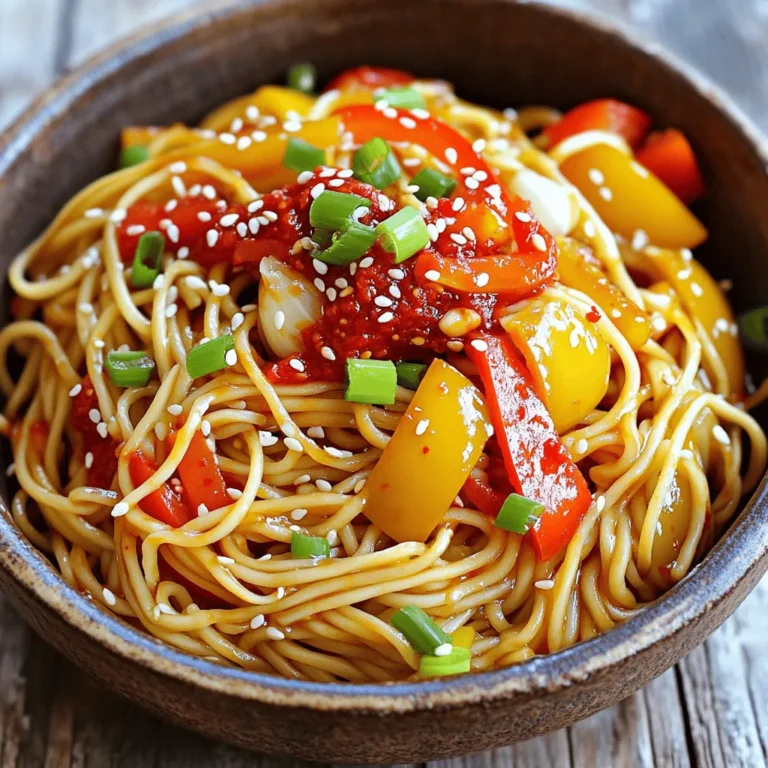
Chili Garlic Noodles Tasty Recipe You’ll Love
Sriracha Honey Glazed Salmon Tasty and Simple Recipe
Spicy Korean Chicken Bowls Flavorful and Easy Meal
Honey Mustard Chicken Salad Healthy Flavorful Option
Easy Chicken Enchilada Casserole Tasty and Simple Meal
Crispy Parmesan Crusted Chicken Flavorful Delight
Avocado Toast with Poached Egg Flavorful Start to Day
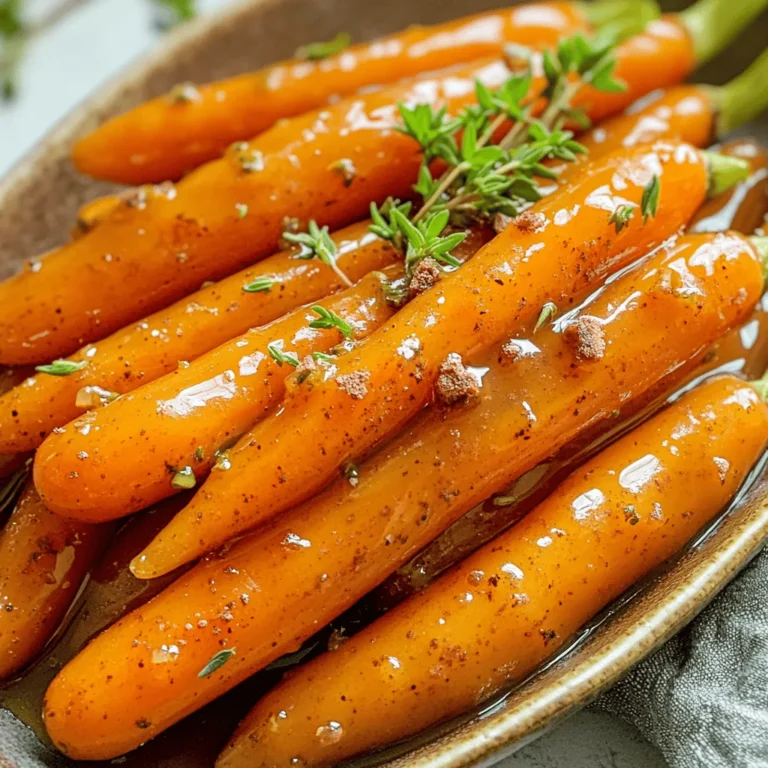
Maple Glazed Carrots Rich Flavor for Your Table
Page navigation
Previous Page
Previous
1
2
3
4
…
6
Next Page
Next
Home
Dinner
Appetizer
Desserts
Drinks
About
Contact
Privacy Policy
Toggle Menu Close
Search for:
Search

![- 1 lb Brussels sprouts - 4 cloves of garlic - Extra-virgin olive oil The main ingredients create a tasty base for Garlic Roasted Brussels Sprouts. Start with fresh Brussels sprouts. You want them firm and bright green. The garlic adds a punch of flavor. Use fresh cloves for the best taste. Extra-virgin olive oil helps the sprouts roast perfectly. It adds richness and helps flavors blend well. - Sea salt and black pepper - Balsamic vinegar and honey - Parmesan cheese and parsley Seasoning is key to great flavor. A pinch of sea salt and black pepper brings out the natural taste of the Brussels sprouts. Balsamic vinegar and honey add a delightful sweetness and tanginess. If you want a creamy touch, sprinkle Parmesan cheese on top. Fresh parsley not only adds flavor but also brightens the dish's look. - Calories per serving: Approximately 150 calories - Health benefits of Brussels sprouts: Rich in vitamins C and K Brussels sprouts are not just tasty; they are good for you too! They are low in calories and high in fiber. This helps with digestion and keeps you full. They are also packed with vitamins. Vitamin C boosts your immune system, while vitamin K supports bone health. Enjoy your Garlic Roasted Brussels Sprouts knowing you are eating healthy! For the full recipe, check out the Full Recipe section. First, you need to preheat your oven to 400°F (200°C). This temperature helps the Brussels sprouts cook evenly. While the oven warms up, trim the ends of the Brussels sprouts. Then, cut each sprout in half. This step allows for better roasting and helps them cook faster. Next, take a large mixing bowl. Add the halved Brussels sprouts, minced garlic, and extra-virgin olive oil. Toss everything together until the sprouts are nicely coated. Sprinkle in sea salt and freshly ground black pepper. This adds great flavor to your dish. Now, arrange the Brussels sprouts on a baking sheet. Make sure to spread them out in a single layer. If they are too close, they won’t roast well. Place the baking sheet in the oven and roast for about 20-25 minutes. Halfway through cooking, stir the sprouts gently. This helps them brown evenly and get crispy. For the complete recipe, be sure to check out the [Full Recipe]. Spacing and temperature are key to great roasted Brussels sprouts. Make sure to spread the sprouts out on the baking sheet. If they are too close, they will steam instead of roast. This can lead to a soggy texture. Aim for a single layer for best results. Preheat your oven to 400°F (200°C). This hot temperature helps the sprouts caramelize and turn golden brown. To achieve that crispy texture, roast for 20-25 minutes. Stir halfway through to ensure they cook evenly. You'll know they are done when they are golden brown with crispy edges. Trust me, this is the magic moment! While garlic and olive oil are perfect, you can add more flavor. Try spices like smoked paprika or cayenne pepper for a kick. These add depth and a hint of heat. If you want a touch of sweetness, drizzle some maple syrup over the sprouts. This will balance the flavors perfectly. Presentation makes your dish shine. Serve the finished Brussels sprouts in a vibrant bowl. This helps the golden color pop. For an extra touch, sprinkle fresh parsley on top. The green color adds freshness and looks inviting. You can also squeeze fresh lemon juice over them just before serving. This brightens the flavor and adds a lovely zing. For the full recipe, check out the Garlic Roasted Brussels Sprouts section. {{image_4}} You can make garlic roasted Brussels sprouts even tastier with some fun additions. - Adding nuts or seeds: Toss in some chopped walnuts or sliced almonds. This adds a nice crunch and rich flavor. You can also try sunflower seeds for a nut-free option. - Spicing it up with red pepper flakes: If you like heat, sprinkle some red pepper flakes on the sprouts. This gives a mild kick that works well with the garlic and balsamic glaze. Eating needs can vary, so here are some easy swaps. - Vegan-friendly substitutions: To keep it vegan, just skip the Parmesan cheese. Use maple syrup instead of honey for the glaze. Both changes keep the dish delicious and plant-based. - Gluten-free options: This recipe is naturally gluten-free. Just make sure any added ingredients, like balsamic vinegar, are also gluten-free. Brussels sprouts pair well with many dishes, making them great for any meal. - Best side dishes to complement: Serve them with creamy mashed potatoes or fluffy quinoa. Both sides balance the sprouts' flavors and textures nicely. - Main courses that go well with Brussels sprouts: Roast chicken or grilled salmon are perfect options. Their savory notes blend beautifully with the garlic and balsamic flavors of the sprouts. Explore the [Full Recipe] for more tips and details on this dish! To store leftovers, cool the Brussels sprouts first. Place them in an airtight container. This helps keep them fresh for longer. Store in the fridge for up to three days. When you’re ready to eat, reheat them in the microwave or oven. For the oven, preheat to 350°F (175°C) and warm them for about 10 minutes. This keeps them crispy and tasty. You can freeze cooked Brussels sprouts if you want to keep them longer. First, let them cool completely. Then, spread the sprouts in a single layer on a baking sheet. Freeze until solid, which takes about an hour. Afterward, transfer them to a freezer-safe bag or container. This way, they won’t stick together. When you are ready to use them, thaw in the fridge overnight. Reheat in the oven or microwave until hot. When stored properly, cooked Brussels sprouts last about three to four days in the fridge. In the freezer, they can last up to three months. Always check for any off smell or change in color before eating. Keeping these tips in mind helps you enjoy your Garlic Roasted Brussels Sprouts for longer! For the full recipe, check the section above. The best way to prepare Brussels sprouts is to roast them. Roasting brings out their natural sweetness and creates a crispy texture. You can also steam or sauté them, but roasting gives the best flavor. Make sure to trim the ends and cut them in half for even cooking. To make Garlic Roasted Brussels sprouts crispy, follow these tips: - Space them out on the baking sheet. - Avoid overcrowding, as this causes steaming instead of roasting. - Use enough oil to coat each sprout. - Roast at a high temperature, around 400°F (200°C). - Stir halfway through to ensure even crispiness. Yes, you can prepare Garlic Roasted Brussels sprouts ahead of time. You can trim and halve them in advance. Store them in the fridge until you are ready to roast. Roasting them fresh gives the best taste, but you can also reheat them. To reheat, spread them on a baking sheet and warm them in the oven. Garlic Roasted Brussels sprouts pair well with many dishes. They complement roasted meats like chicken or beef. They also work great with grains, such as quinoa or rice. For a vegetarian meal, serve them with a hearty salad or pasta. Don’t forget to check the Full Recipe for more serving ideas! Garlic roasted Brussels sprouts are simple and tasty. You only need a few ingredients: Brussels sprouts, garlic, and olive oil. By mixing in salt and pepper, you enhance the flavor. You can also use balsamic vinegar and Parmesan for extra taste. Remember the key steps: prepare your oven, mix ingredients, and roast for crispiness. Adding your own twists, like nuts or spices, can make them even better. These sprouts are healthy too! They fit well with many meals and are easy to store. Enjoy this delicious dish today!](https://tastyrecipes.blog/wp-content/uploads/2025/07/2d241bbf-f25e-4aa4-b426-1fc3059dea4a-768x768.webp)


. - Combine honey, Dijon mustard, apple cider vinegar, and olive oil in a small bowl. - Whisk until emulsified and season with salt and pepper. This dressing brings a sweet and tangy flavor that makes your salad shine. The honey adds sweetness, while the mustard gives it a nice kick. Apple cider vinegar brightens the mix, and olive oil adds richness. Whisk it well so that all the flavors mix together smoothly. - Mix shredded chicken, salad greens, cherry tomatoes, red onion, cucumber, and walnuts in a large bowl. - Toss gently to combine. In this step, you create a colorful base for your salad. The shredded chicken provides protein, while the greens add vitamins. Cherry tomatoes and cucumber give freshness, and walnuts add crunch. Toss gently to keep the greens from bruising while making sure everything is evenly mixed. - Drizzle dressing over the salad and toss until coated. - Top with crumbled feta cheese. Drizzling the dressing over the salad lets every bite shine with flavor. Toss it well so that the dressing coats all the ingredients. Finally, add crumbled feta cheese on top for a creamy finish. This adds a lovely saltiness that balances the sweetness of the honey. Follow this method for a vibrant Honey Mustard Chicken Salad. For the complete recipe, check out the Full Recipe section. Chill your salad for 30 minutes before serving. This helps the flavors blend well. Adjust the seasoning based on your taste. If you prefer it sweeter, add more honey. For a tangy kick, use extra vinegar. Serving the salad in individual bowls creates an elegant look. It feels special and personal. Garnish with extra cherry tomatoes and a drizzle of dressing. This adds color and vibrancy to your dish. Using leftover rotisserie chicken is a great shortcut. It saves time and adds flavor. For a fresh taste, opt for homemade dressing. It’s easy to make and tastes much better than store-bought. You can find the full recipe for the dressing in the previous section. {{image_4}} You can change the protein in this salad to suit your taste. Swap chicken for grilled shrimp or chickpeas for a fun twist. Grilled shrimp adds a nice char and a touch of seafood. Chickpeas give a hearty feel and are a great plant-based option. You can also add sliced hard-boiled eggs for extra protein. Eggs bring a creamy texture and a boost of nutrients to your meal. The greens in your salad can change the taste and feel. You can substitute mixed greens with spinach or kale. Spinach adds a soft texture, while kale brings a crunchy bite. Both are rich in vitamins. If you want a peppery kick, include arugula. It gives a nice contrast to the sweet honey mustard dressing. Consider adding fruits like apples or pears for extra sweetness. Crunchy apples pair well with the dressing, while pears add soft sweetness. You can also add avocado for creaminess. Avocado not only tastes great but also offers healthy fats. Mixing these flavors will make your Honey Mustard Chicken Salad even more delicious. Check out the Full Recipe for more ideas on how to create your own unique dish! Store your Honey Mustard Chicken Salad in an airtight container. It will stay fresh for up to 3 days. Keeping the dressing separate helps keep the greens crisp. Pour it over the salad just before serving. I do not recommend freezing this salad. Freezing changes the texture of the greens. They can become mushy when thawed. To make meal prep easy, prepare salad ingredients ahead of time. Store them in individual containers. This way, you can grab and mix them when you are ready to eat. It saves time and makes lunch quick and easy! You can easily transform this dish. Use plant-based chicken as a substitute. For the dressing, choose a vegan alternative without honey. This keeps the flavor while fitting a vegan diet. To keep your salad fresh, store it in an airtight container. Make sure to eat it within 3 days for the best taste and texture. Absolutely! You can swap walnuts with almonds or pecans. Both options add a unique crunch and flavor to your salad. Yes, this recipe is naturally gluten-free. Just double-check that your mustard is also gluten-free to ensure no hidden gluten sneaks in. If you enjoy heat, add sliced jalapeños or a dash of hot sauce to the dressing. This adds a nice kick and elevates the flavor profile. For the full recipe, check out the detailed steps to create this delicious Honey Mustard Chicken Salad! This blog post gives you a tasty way to make a Honey Mustard Chicken Salad. We covered all the ingredients, including main items and dressings, plus optional garnishes. I explained how to prepare the dressing and assemble the salad step by step. Remember, you can customize it with different proteins and greens. It’s easy to store and perfect for meal prep. With these tips, you can enjoy a fresh and healthy dish anytime. Try it out, and tweak it to fit your taste!](https://tastyrecipes.blog/wp-content/uploads/2025/06/44bf63d5-cd9b-4ff5-accf-1fd6a006664a-768x768.webp)

![For the Crispy Parmesan Crusted Chicken, you need simple yet tasty ingredients. Here’s what you’ll need: - 4 boneless, skinless chicken breasts - 1 cup grated Parmesan cheese - 1 cup panko breadcrumbs - 1 teaspoon garlic powder - 1 teaspoon onion powder - 1 teaspoon Italian seasoning - Salt and pepper to taste - 2 large eggs - 1 tablespoon Dijon mustard - 2 tablespoons fresh parsley, finely chopped (for garnish) - Olive oil spray Each ingredient plays a key role in creating the perfect crunchy crust. The chicken provides a juicy base. The Parmesan cheese gives a rich, savory flavor. Panko breadcrumbs add that extra crunch. Garlic and onion powders bring warmth, while Italian seasoning adds a hint of herbiness. Eggs and Dijon mustard help the coating stick, while olive oil spray ensures a golden finish. Don't rush the process. Gather your ingredients first. Following the [Full Recipe] will lead you to a delicious dinner. 1. Preheat your oven to 425°F (220°C). This is key for a great crust. 2. Line a baking sheet with parchment paper or a silicone mat. This helps with cleanup. 3. In a shallow bowl, mix together the grated Parmesan cheese, panko breadcrumbs, garlic powder, onion powder, Italian seasoning, salt, and pepper. Stir until well mixed. 4. In another bowl, whisk together the eggs and Dijon mustard until smooth. This will be your egg wash. 1. Pat the chicken breasts dry with paper towels. This helps the coating stick. 2. Season both sides of the chicken breasts with salt and pepper. 3. Dip each chicken breast into the egg wash. Make sure to coat them well, then let any excess drip off. 4. Next, press the chicken into the Parmesan breadcrumb mixture. Make sure to cover all sides evenly. 1. Arrange the coated chicken on the prepared baking sheet. 2. Lightly spray the tops with olive oil to promote crispiness. 3. Bake in the preheated oven for 20-25 minutes. Check that the internal temperature reaches 165°F (75°C). 4. Once done, remove the chicken and let it rest for a few minutes. This keeps it juicy. 5. Garnish with freshly chopped parsley before serving. This adds color and freshness. For the full recipe, check out the details above. To get that crunchy bite, start by drying the chicken. Moisture can make the crust soggy. Use paper towels to pat each breast dry. Next, preheat your oven to 425°F (220°C). This high heat helps create that golden crust. Bake the chicken for 20-25 minutes. Check for an internal temperature of 165°F (75°C). That ensures it’s cooked through and safe to eat. You can add more flavor to your chicken by changing up the seasonings. Try smoked paprika or cayenne pepper for some heat. Fresh herbs like thyme or rosemary also work well. They add a fragrant touch. Experiment with different spices to find your favorite mix. You might even enjoy a dash of lemon zest for brightness. When serving your Crispy Parmesan Crusted Chicken, think about your sides. A fresh mixed salad or steamed veggies pairs nicely. Arrange the chicken on a large plate. Add lemon wedges for a zesty flair. Finally, sprinkle some freshly chopped parsley on top. It adds color and freshness to your meal. For a fun twist, serve with dipping sauces like honey mustard or aioli. {{image_4}} You can switch up the protein in this recipe. Try using pork or fish. Pork chops work well with the same crispy coating. Fish like tilapia or cod can also be delicious. Just adjust the cooking time. Fish will need less time in the oven. If you want a vegetarian option, use eggplant or zucchini. Slice them thick, then follow the same steps. The cheese and breadcrumbs add great flavor. You can try this as a tasty meatless meal! You can change the cheese for new flavors. Mozzarella or cheddar can add a twist. Each cheese brings a unique taste. Mix in some herbs like parsley or basil for a fresh kick. Using flavored breadcrumbs adds depth. Look for garlic or herb panko. These small changes can make a big difference in taste. Feel free to experiment until you find your favorite! Air frying is a great option for a healthier version. Set your air fryer to 400°F (200°C). Cook the chicken for about 12-15 minutes. Check that the internal temperature reaches 165°F (75°C). This method gives a nice crunch without using much oil. You can also cook in a skillet. Heat some olive oil over medium heat. Fry the chicken for about 5-7 minutes on each side. This method will give you a nice golden crust, too. Each method adds its own flavor and texture to the dish. For the full recipe, check out the instructions above. To keep your Crispy Parmesan Crusted Chicken fresh, store it in the fridge. Place the chicken in an airtight container. It stays good for about three to four days. For best taste, eat it within this time. If you notice any off smells, it’s best to toss it out. When reheating, aim for a crispy texture. Preheat your oven to 375°F (190°C). Place the chicken on a baking sheet. Bake for about 10-15 minutes. Keep an eye on it to avoid drying out. Avoid microwaving, as it can make the chicken soggy. If you must use the microwave, do so for a short time, and let it rest briefly before eating. You can freeze this chicken both before and after cooking. If freezing raw, coat the chicken as you normally would. Place it in a freezer bag, removing as much air as possible. It will last up to three months. To freeze cooked chicken, let it cool first, then wrap it tightly. Thaw overnight in the fridge before reheating. When ready to cook, ensure the chicken reaches an internal temperature of 165°F (75°C). To make your chicken extra crispy, ensure you dry the chicken well before coating. A good tip is to pat the chicken with paper towels. This removes any moisture. Also, use panko breadcrumbs. They create a crunchier texture than regular breadcrumbs. Finally, lightly spray the coated chicken with olive oil before baking. This helps the crust get golden. Yes, you can use regular breadcrumbs, but panko works best. Panko is lighter and flakier. This leads to a crunchier finish. If you only have regular breadcrumbs, consider mixing them with some crushed crackers for a better texture. You can serve many sides with this dish. I love a fresh mixed salad for a light touch. Steamed vegetables like broccoli or green beans also pair well. For something hearty, try mashed potatoes or garlic bread. These options balance the meal nicely. The best way to check is by using a meat thermometer. The internal temperature should reach 165°F (75°C). If you don’t have a thermometer, cut into the thickest part of the chicken. The meat should be white and juices should run clear, not pink. Yes, you can make this dish in advance. You can coat the chicken and store it in the fridge for up to a day. When ready to bake, just pop it in the oven. This saves time and still gives you that crispy texture. For best results, cook it fresh if possible. Check the [Full Recipe] for more details! In this post, we covered how to make Crispy Parmesan Crusted Chicken. You learned about the key ingredients and step-by-step instructions for perfecting this dish. We also discussed helpful tips for a crispy texture, variations for different diets, and storage methods for leftovers. Try these ideas to create a meal that impresses anyone. Enjoy cooking and have fun with this recipe!](https://tastyrecipes.blog/wp-content/uploads/2025/06/dbe16707-1540-4087-9e82-8e83a32805d1-768x768.webp)
![- 2 slices of whole grain bread - 1 ripe avocado - 2 large eggs - 1 tablespoon fresh lemon juice - Salt and freshly ground black pepper, to taste - ¼ teaspoon red chili flakes (optional) - Fresh herbs (cilantro or chives), finely chopped - A drizzle of extra virgin olive oil - Additional toppings (e.g., feta, smoked salmon) When I create avocado toast with poached eggs, I focus on fresh, quality ingredients. Whole grain bread gives a hearty base that pairs well with creamy avocado. I love to choose a ripe avocado; it should feel soft but not mushy. The eggs should be large and fresh, as they will become the star of the dish. The seasoning is simple yet vital. The fresh lemon juice adds brightness. I always have salt and black pepper on hand. For a bit of heat, I use red chili flakes. Fresh herbs, like cilantro or chives, add a lovely finishing touch. If you want to elevate your toast, consider optional add-ons. A drizzle of extra virgin olive oil enhances the flavor. You can also add toppings like feta or smoked salmon. These choices allow you to customize your toast to your taste. This dish combines nutrition and flavor, making it a perfect start to the day. You can find the Full Recipe linked here for a complete guide to making this delicious meal. Start by choosing your favorite bread. You can use a toaster or a grill. If you use a toaster, just pop in the slices. For grilling, lay the bread on a hot grill for a few minutes. You want your bread to be golden brown. This gives your toast a nice crunch and holds up the toppings well. Grab a ripe avocado and cut it in half. Be careful when removing the pit! Scoop the green flesh into a bowl. Use a fork to mash it. You can go for a smooth or chunky texture, depending on your taste. Add one tablespoon of fresh lemon juice to keep it bright and green. Sprinkle in some salt and black pepper. If you like heat, toss in a bit of red chili flakes. Mix it well and set aside. Fill a medium saucepan with water and bring it to a gentle simmer. Crack an egg into a small bowl. To make a whirlpool, stir the water with a spoon. Gently slide the egg into the center of the whirlpool. This helps shape the egg as it cooks. Poach the egg for about three minutes for a soft yolk or four minutes for a firmer one. Use a slotted spoon to lift the egg out and let it drain. Repeat with the second egg. Now it’s time to build your masterpiece! Take the toasted bread and spread a generous layer of avocado mash on each slice. Place one poached egg on top of each slice. Let the yolk run over the creamy avocado. This adds a delicious touch. For a pretty finish, drizzle some extra virgin olive oil on top. Sprinkle with fresh herbs like cilantro or chives for color and taste. Enjoy your creation! You can find the full recipe for Avocado Toast with Poached Egg above. To prevent eggs from breaking while poaching, use fresh eggs. Fresh eggs hold their shape better. When you crack an egg, do it into a small bowl first. This technique lets you see any broken yolks. Then, gently slide the egg into the simmering water. For the yolk's firmness, time is key. Poach the egg for about three minutes for a runny yolk. For a firmer yolk, extend the time to four minutes. Use a slotted spoon to lift the egg out of the water. Place it on a paper towel to drain excess water. When mashing avocado, decide if you want a smooth or chunky texture. For a smooth mash, use a fork to mash thoroughly. If you prefer it chunky, mash just enough to leave some small pieces. This adds a nice bite to your toast. To enhance flavor, try adding spices like garlic powder or cumin. Fresh herbs like cilantro or chives also boost taste. A pinch of salt and a squeeze of lemon juice brighten the flavor and keep the avocado from browning. Choosing the right bread is important. Whole grain bread offers a nutty flavor and hearty texture. Sourdough gives a tangy twist. For a lighter option, try rye or a gluten-free bread. You can also add flavor in many ways. Top the toast with sliced tomatoes or radishes for crunch. A sprinkle of feta cheese adds creaminess. For a spicy kick, drizzle with hot sauce or add sliced jalapeños. These little changes can create a unique twist on classic avocado toast. Check out the Full Recipe for a complete guide to making this delicious dish. {{image_4}} You can make your avocado toast more inclusive. For a gluten-free option, try using gluten-free bread. This way, those with gluten allergies can still enjoy this tasty dish. Look for bread made from almond flour or rice flour. They offer a great texture and flavor. If you want a vegan twist, swap out the poached egg. Use aquafaba, the liquid from canned chickpeas, instead. Whip it until fluffy. This will give you a light, airy topping that’s vegan-friendly. You can also try using tofu scramble for a protein boost. Want to jazz up your avocado toast? Add some Mediterranean flair! Toss in chopped olives, diced tomatoes, or crumbled feta cheese. This gives your dish a fresh taste and brings in new textures. A sprinkle of oregano or basil can enhance these flavors even more. If you like spice, try different types of chili. Sliced jalapeños or a dash of sriracha can add a nice kick. You can also mix in chili flakes or a spicy oil. These tiny changes can transform your dish into a fiery delight! Fresh produce can keep your avocado toast exciting all year. In spring, add radishes or fresh peas for a crisp bite. During summer, toss on ripe tomatoes or corn. Fall brings delicious pumpkin seeds or roasted squash. In winter, think about using citrus fruits to brighten the dish. Herbs can be a fun way to switch things up too. In the spring, use fresh dill or chives. In the summer, basil shines. Fall can bring sage or thyme, while winter might call for parsley or rosemary. These small touches can change your avocado toast in amazing ways. For the full recipe, check out the section above! To keep your avocado fresh, store it in an airtight container. You can add a little lemon juice to slow down browning. If you have leftover toast, keep it in a paper bag. This helps it stay crisp. For poached eggs, use a shallow container with a lid. Place the eggs in cold water to keep them moist. They should be used within a day for the best taste. To reheat toasted bread, place it in a toaster or an oven. This helps it regain its crunch. You can also use a skillet over medium heat. Just heat it for a few minutes until warm. For leftover avocado mash, a quick stir with a fork can help. If it's thick, add a little lemon juice or water. This brings back its creamy texture. In the fridge, avocados can last about 3 to 5 days if ripe. If they are not ripe, they can last longer. Always check for dark spots on the skin. A fresh avocado feels firm but gives slightly when pressed. For eggs, poached ones last about 1 day in the fridge. Check for any off smells or changes in texture before using. To make the perfect poached egg, follow these steps: - Heat water: Fill a medium saucepan with water and bring it to a gentle simmer. - Prepare the egg: Crack the egg into a small bowl. This helps you slide it in gently. - Create a whirlpool: Use a spoon to stir the water in a circular motion. This keeps the egg together. - Add the egg: Slowly slide the egg into the center of the whirlpool. - Timing: Poach for about 3 minutes for a runny yolk or 4 minutes for a firmer yolk. - Remove and drain: Use a slotted spoon to take out the egg. Place it on a paper towel to remove excess water. This method gives you a smooth, soft egg with a lovely runny yolk. Yes, you can prepare parts of your avocado toast in advance. Here are some tips: - Toast the bread: You can toast the bread up to a day ahead. Store it in an airtight bag. - Prepare the avocado: Mash the avocado just before serving. To keep it fresh, add lemon juice and cover it tightly. - Poach eggs ahead: You can poach eggs in advance. Store them in cold water in the fridge. Reheat in hot water when ready to serve. This way, you can enjoy your avocado toast quickly, even on busy mornings. Choosing the right bread can enhance your avocado toast. Here are some great options: - Whole grain bread: It has more fiber and nutty flavor. - Sourdough: Its tangy taste pairs well with creamy avocado. - Rye bread: Offers a unique taste with a chewy texture. - Gluten-free bread: Perfect for those avoiding gluten. Each of these breads brings something special to your dish. Yes, avocado toast is packed with nutrients. Here are some benefits: - Healthy fats: Avocados have monounsaturated fats that are good for your heart. - Vitamins: They are rich in vitamins C, E, and K, which support skin and immune health. - Fiber: Avocados provide fiber, aiding digestion and keeping you full longer. This makes avocado toast a smart choice for breakfast or a snack. To make your avocado toast more filling, try these ideas: - Add protein: Top with poached eggs, smoked salmon, or feta cheese. - Include nuts or seeds: Sprinkle chia seeds or sliced almonds for a crunch. - Mix in veggies: Add sliced tomatoes, radishes, or spinach for extra nutrients. These additions will keep you satisfied throughout the morning. For the complete recipe, check [Full Recipe]. Avocado toast is a simple yet delicious dish that brings joy to meals. We discussed the key ingredients—whole grain bread, ripe avocados, and poached eggs. You learned the best methods for toasting, mashing, and poaching for perfect texture. We shared tips for variations to fit dietary needs and storage info to keep your ingredients fresh. Remember, this tasty meal can be customized however you like. Enjoy making your own avocado toast and make it a regular delight in your kitchen!](https://tastyrecipes.blog/wp-content/uploads/2025/06/4e870a73-3474-47f6-b460-70c50503aefe-768x768.webp)