Skip to content
About
Contact
Cookie Policy
Copyright Policy
Disclaimer
Search
Home
Dinner
Appetizer
Desserts
Drinks
About
Contact
Privacy Policy
Toggle Menu
Home
/
Dinner
- Page 6
Dinner
Spinach Mushroom Quiche Delicious and Easy Meal
Cheesy Broccoli Rice Casserole Delightful Family Meal
Taco Stuffed Zucchini Boats Flavorful Low-Carb Dish
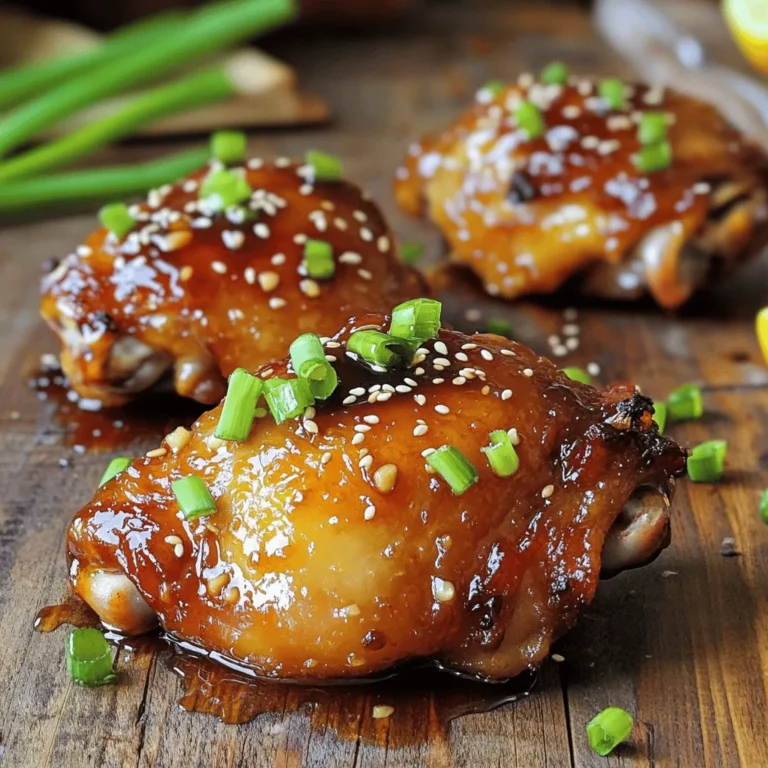
Honey Garlic Chicken Thighs Simple and Flavorful Meal
Classic Chicken Pot Pie Comfort Food Recipe
Chicken Enchilada Casserole Delightful and Easy Meal
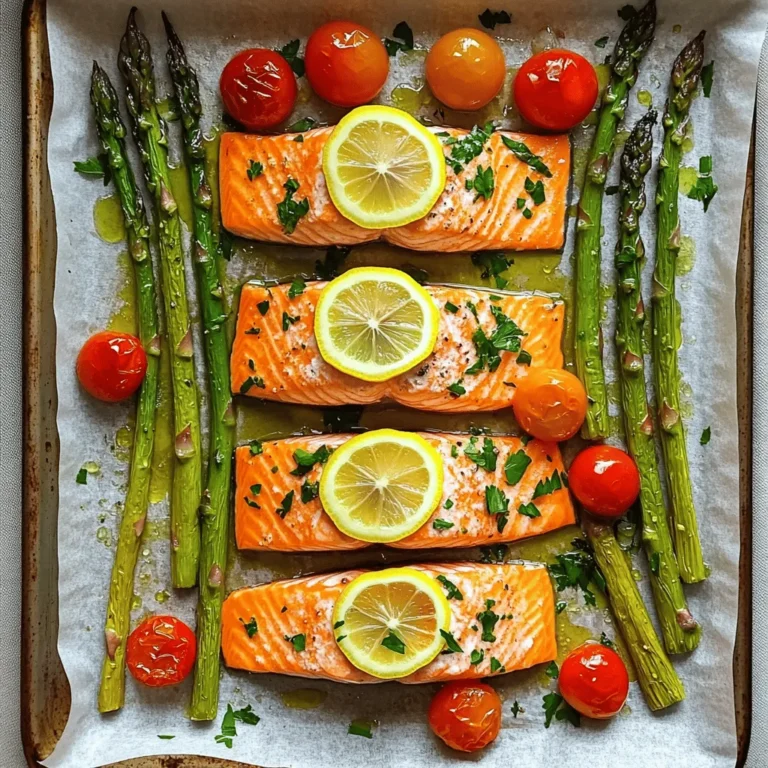
Easy Sheet Pan Salmon Healthy and Quick Dinner Recipe
Creamy Broccoli Cheddar Soup Simple and Delicious Meal
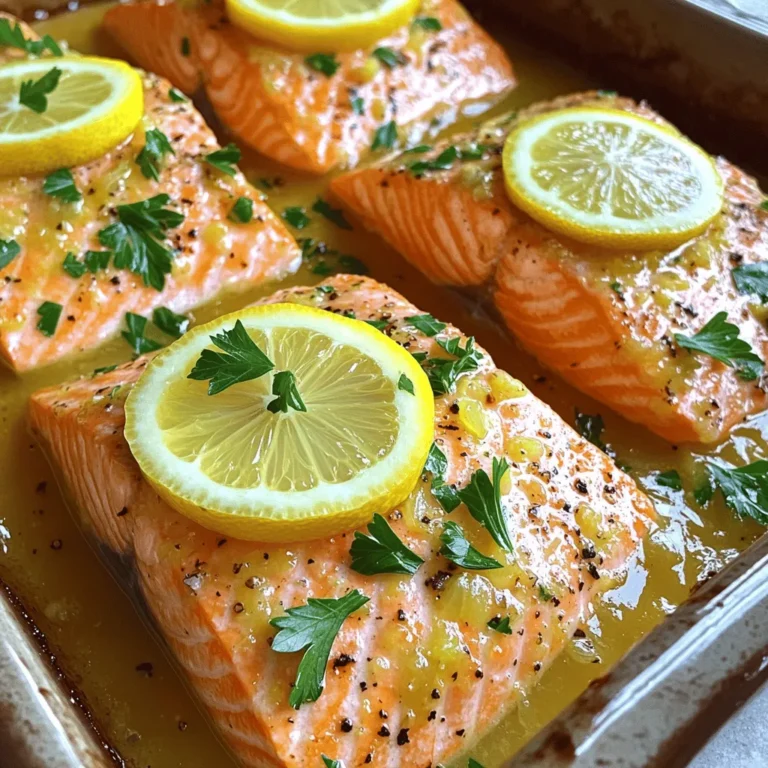
Easy Lemon Garlic Salmon Flavorful and Quick Recipe
Page navigation
Previous Page
Previous
1
…
4
5
6
Home
Dinner
Appetizer
Desserts
Drinks
About
Contact
Privacy Policy
Toggle Menu Close
Search for:
Search


![When making taco stuffed zucchini boats, you'll need simple ingredients that pack a punch. Here’s what you need: - 4 medium zucchini - 1 tablespoon olive oil - 1 pound ground turkey or beef - 1 small onion, finely diced - 2 cloves garlic, minced - 1 cup canned black beans, rinsed and drained - 1 cup corn (frozen or fresh) - 1 packet taco seasoning - 1 cup diced tomatoes (fresh or canned) - 1 cup shredded cheese (cheddar or Mexican blend) - Fresh cilantro, chopped, for garnish - Sour cream or Greek yogurt, for serving (optional) - Lime wedges, for serving These ingredients work together to create a dish that is not only tasty but also low in carbs. The zucchini acts as a healthy base, while the taco filling adds a burst of flavor. You can find the full recipe at the end of this article. It shows you how to bring all these ingredients together into a meal that everyone will love. - Preheat the oven to 375°F (190°C). This ensures the zucchini cooks evenly. - Take each zucchini and cut them in half lengthwise. Use a spoon to scoop out the center, making a boat shape. Keep the flesh you scoop out for later. - In a large skillet, heat the olive oil over medium heat. Add the diced onion and minced garlic. Sauté for about 3-4 minutes until the onion is soft and smells good. - Next, add the ground turkey or beef to the skillet. Break it apart with a spatula while it cooks. Cook for around 5-7 minutes until it’s nicely browned. - Stir in the reserved zucchini flesh, black beans, corn, taco seasoning, and diced tomatoes. Cook this mixture for another 5 minutes. Make sure everything is warm and mixed well. - Now, take the hollowed zucchini boats and place them in a baking dish. Fill each boat with the taco meat mixture, packing it in for a hearty meal. - Sprinkle the remaining shredded cheese on top of each boat for a cheesy finish. - Cover the baking dish with aluminum foil and bake in the oven for 25 minutes. After that, remove the foil and bake for another 10-15 minutes. The zucchini should be soft, and the cheese should be bubbling and golden. - Once done, take the zucchini boats out of the oven and let them cool for a few minutes. Before serving, add freshly chopped cilantro for extra flavor. For the full recipe, refer to the complete instructions provided. To keep your zucchinis tender but not mushy, choose medium-sized ones. Larger zucchinis can hold too much water. Cut them in half lengthwise and scoop out some flesh, but leave enough to keep them sturdy. Bake at 375°F (190°C) for the best texture. For perfectly melted cheese, use shredded cheese rather than slices. Layer the cheese on top of the filling before baking. Remove the foil during the last baking phase to let the cheese brown. This step adds flavor and texture. To enhance your meal, serve with sour cream or Greek yogurt. Lime wedges add a zesty touch. You can also pair these boats with a fresh salad or tortilla chips for crunch. For a stylish presentation, place the zucchini boats on a wooden platter. Drizzle with sour cream and sprinkle with cilantro right before serving. This makes for a colorful, eye-catching dish that impresses guests. For a vegetarian option, use beans and lentils in place of meat. You can also add extra veggies to the filling for more flavor and texture. If you need a dairy-free version, skip the cheese or use vegan cheese alternatives. Coconut yogurt can replace sour cream. These small changes keep the dish delicious while meeting your dietary needs. For the full recipe, check out Taco Stuffed Zucchini Boats. {{image_4}} You can easily switch up the protein in your taco stuffed zucchini boats. If you want a lighter option, try using chicken. Ground chicken is a great choice. It cooks quickly and takes on flavors well. If you prefer a meatless dish, use beans instead. Black beans or pinto beans work nicely. They add protein and fiber while keeping it hearty. To kick up the heat, add spicy elements. Jalapeños bring a nice zing, while cayenne pepper adds a bold flavor. If you enjoy the crunch, toss in some chopped bell peppers or corn. You can also add diced onions or mushrooms for extra texture and taste. Mixing in these veggies makes each bite more exciting! You can give your zucchini boats an international flair. For a Mexican touch, top with guacamole or pico de gallo. The creaminess of avocado balances the spices. If you want a Mediterranean twist, sprinkle some feta and add olives. This mix creates a fresh and tangy flavor that pairs well with the zucchini. These variations let you explore new tastes and keep your meals fun! For the full recipe, check out [Full Recipe]. To store leftover taco stuffed zucchini boats, let them cool first. Place them in an airtight container. They will stay fresh for up to four days in the fridge. The zucchini should remain firm, and the filling will hold its flavor well. To freeze the zucchini boats, wrap them tightly in plastic wrap. Then, place them in a freezer-safe bag. They can last up to three months in the freezer. When ready to eat, thaw overnight in the fridge. Reheat in the oven at 350°F (175°C) until heated through. This helps keep the flavor and texture intact. You can prepare the filling in advance. Cook the meat and mix in the other ingredients. Store this mixture in the fridge for up to three days. When you're ready to eat, simply fill the zucchini and bake. Aim for one boat per serving for easy meal planning. This helps save time and makes healthy eating simple. For more ideas, check the Full Recipe for variations. Can I use different types of meat for the filling? Yes, you can use any ground meat you like. Ground chicken, pork, or even plant-based meat work well. Each meat brings its own flavor, so feel free to experiment! How do I make taco stuffed zucchini boats vegan? To make this dish vegan, swap meat for lentils or black beans. Use vegan cheese or skip it entirely. You can add more veggies for texture and flavor. Can I prepare the filling in advance? Absolutely! You can cook the filling a day ahead. Store it in the fridge. Just reheat it before stuffing the zucchini. What can I do with leftover zucchini flesh? You can add the leftover zucchini flesh to soups, stir-fries, or salads. It’s great for adding nutrients and flavor. How do I know when the zucchini is done baking? The zucchini is done when it feels tender when pierced with a fork. The cheese on top should be bubbling and golden. What is the best way to cut zucchini for stuffing? Cut the zucchini in half lengthwise. Use a spoon to scoop out the center flesh. This creates a nice boat shape for filling. What are some good side dishes to serve with this recipe? Serve with a fresh salad, guacamole, or corn tortillas. Rice or quinoa also pairs nicely for a full meal. How can I spice up my taco stuffed zucchini boats further? Add jalapeños for heat or top with salsa. Fresh herbs like cilantro or a squeeze of lime can enhance the flavor too. For the full recipe, visit the provided link and enjoy your cooking adventure! This blog post shared a simple recipe for taco stuffed zucchini boats. I covered the ingredients, step-by-step cooking instructions, and tips for tasty results. You can adapt this dish for various diets and enjoy fun flavors. These stuffed zucchini boats are easy to make and full of nutrition. With a few simple swaps and creative touches, your meal can please everyone at the table. Now, it's your turn to cook and impress!](https://tastyrecipes.blog/wp-content/uploads/2025/06/beefab14-0b63-40b8-b221-b583c53af4aa-768x768.webp)


. This blog post covered the key steps to make Creamy Broccoli Cheddar Soup. We listed all the needed ingredients and offered substitutions for dietary needs. You learned easy cooking instructions and tips to enhance flavor. We also shared ways to modify the recipe, store leftovers, and handle common issues. Remember, this soup is not just a meal; it’s a warm hug in a bowl. With these tips, you can create a dish that’s quick, tasty, and suited to your needs. Enjoy every spoonful!](https://tastyrecipes.blog/wp-content/uploads/2025/06/0eaaa02e-fb88-4710-b94a-6419f0ee122f-768x768.webp)