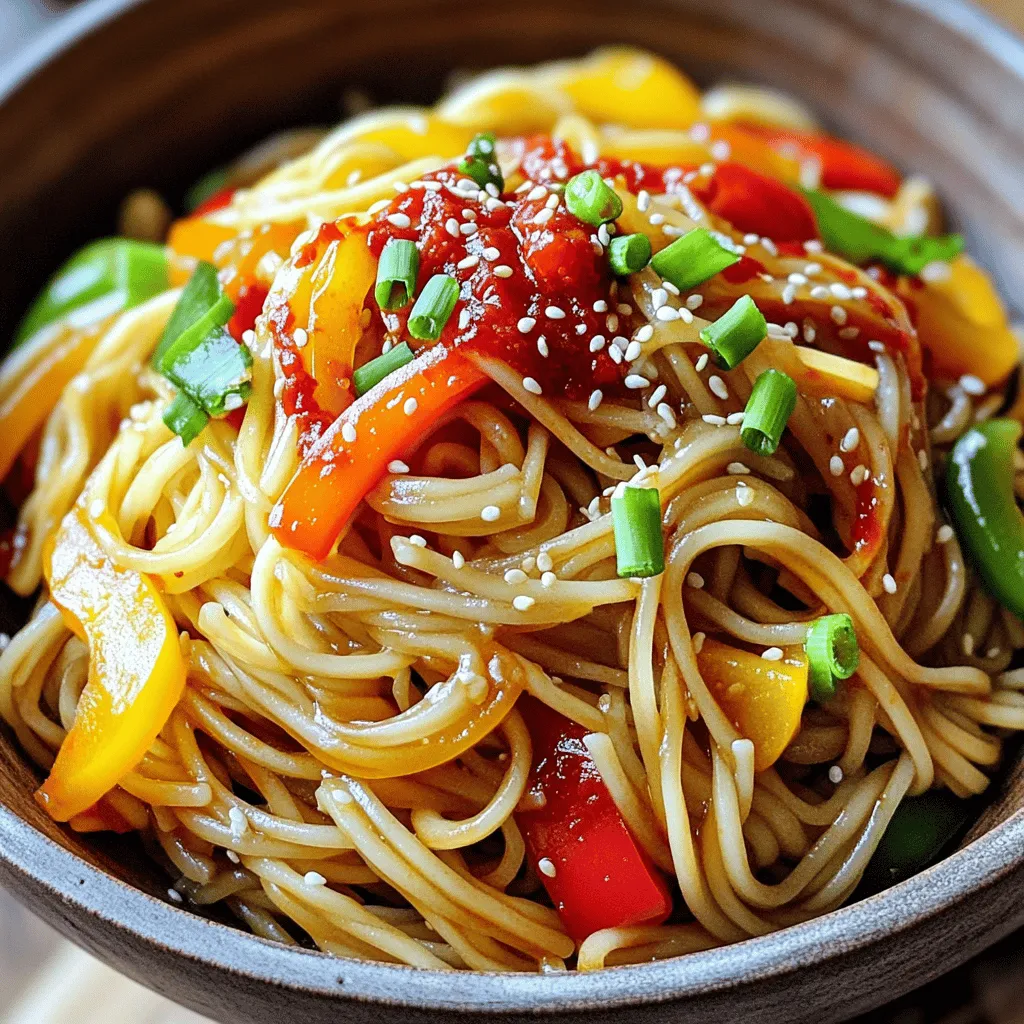
Chili Garlic Noodles Tasty Recipe You’ll Love

Are you ready to fire up your taste buds? In this post, I’ll share a simple and mouth-watering recipe for Chili Garlic Noodles that you’ll love. Packed with flavor, this dish is easy to make and perfect for meals at home or entertaining guests. I’ll walk you through ingredient lists, step-by-step instructions, and spice tips, so you can enjoy a fantastic bowl of noodles in no time. Let’s get cooking!
Ingredients
Complete List of Ingredients
For Chili Garlic Noodles, gather these items:
– 200g noodles (choose from egg, rice, or wheat)
– 3 tablespoons vegetable oil
– 6 cloves garlic, finely minced
– 2-3 tablespoons chili paste (adjust based on your spice preference)
– 1 tablespoon soy sauce
– 1 tablespoon sesame oil
– 1 tablespoon rice vinegar
– 1 tablespoon sugar
– 1 bell pepper, thinly sliced (choose red, yellow, or green for color)
– 2 green onions, sliced (reserve some for garnish)
– Salt, to taste
– Sesame seeds, for garnish
Ingredient Substitutions
You can swap some ingredients if needed:
– Noodles: Use gluten-free rice noodles for a gluten-free option.
– Vegetable oil: Olive oil works well, but it has a different flavor.
– Chili paste: Sriracha or red pepper flakes can add spice.
– Soy sauce: Tamari is a great gluten-free alternative.
– Sugar: Substitute honey or agave syrup for a natural sweetener.
– Bell pepper: Use any favorite veggie, like broccoli or carrots.
Tips for Selecting Fresh Produce
When picking fresh produce, keep these tips in mind:
– Look for bright colors in bell peppers; they should feel firm.
– Check the garlic; it should be dry and have no soft spots.
– Choose green onions that are bright green and crisp.
– Avoid any wilting or browning on the vegetables.
These tips help ensure your dish tastes great and looks good! For the full recipe, check out the details above.
Step-by-Step Instructions
Cooking the Noodles
To start, bring a large pot of salted water to a boil. You want it bubbling hot. Next, add 200g of your chosen noodles. Follow the package instructions until they are al dente. This usually takes 3 to 5 minutes, but check to be sure. Once cooked, drain the noodles in a colander. Rinse them under cold water to stop the cooking. Set the noodles aside for now.
Preparing the Sauce
While the noodles cool, grab a medium bowl. In this bowl, whisk together the chili paste, soy sauce, sesame oil, rice vinegar, and sugar. Mix until smooth. This sauce packs a punch! Taste it and adjust the spice or sweetness if you want. You can add more chili paste for heat or more sugar for sweetness.
Sautéing the Aromatics
Now, let’s heat things up! Take a large skillet or wok and pour in 3 tablespoons of vegetable oil. Heat it on medium. When the oil is hot, add 6 cloves of finely minced garlic. Sauté for about 30 seconds. Be careful, as garlic can burn quickly. You want it fragrant, not brown.
Combining Noodles and Sauce
Next, toss in the sliced bell pepper. Stir-fry for 2-3 minutes until it softens a bit but still has some crunch. Then, add your reserved cooked noodles to the skillet. Pour the sauce over the noodles. Toss everything together gently. Make sure the noodles get coated well with the sauce.
Serving Suggestions
Once everything is mixed, add the sliced green onions and a pinch of salt. Cook for another 2-3 minutes, stirring often. This step warms the dish through. Remove the skillet from heat and plate the noodles. For a lovely finish, garnish with sesame seeds and any reserved green onions. Serve with chopsticks for a fun touch. Enjoy your meal!
Tips & Tricks
How to Adjust Spice Levels
You can make this dish as spicy as you want. Start with 2 tablespoons of chili paste for a mild kick. If you like more heat, add another tablespoon. Always taste as you mix. This way, you control the spice. If it’s too spicy, add a bit of sugar or more noodles to balance it out.
Best Cooking Oils for Flavor
The oil you choose makes a big difference. I recommend vegetable oil for sautéing. It has a high smoke point and doesn’t overpower the dish. You can also try peanut oil for a nutty flavor. If you want a hint of richness, add a dash of sesame oil at the end. It gives a lovely aroma.
Tools and Equipment Needed
You don’t need fancy tools, just some basics. Here’s what you need:
– Large pot for boiling noodles
– Skillet or wok for sautéing
– Medium bowl for mixing the sauce
– Whisk or fork for stirring
– Cutting board and knife for chopping veggies
Having these tools will help you whip up the dish quickly. For the full recipe, check out the instructions above. Happy cooking!
Variations
Vegetarian Options
You can easily make chili garlic noodles vegetarian. Just skip any animal products. Use your favorite veggies like mushrooms, broccoli, or carrots. Toss in some spinach for a pop of color and nutrients. This option is not only flavorful but also very healthy.
Adding Proteins (Chicken, Shrimp, Tofu)
Want to add protein? You have many choices! Chicken works great. Simply slice it thin and cook it before adding the noodles. Shrimp is also a fantastic option. Just make sure to cook them until they turn pink. If you prefer plant-based, tofu is excellent. Press it to remove extra water, then cube and fry it until golden. This adds texture and flavor.
Gluten-Free Alternatives (using rice noodles)
If you need gluten-free options, choose rice noodles. They are light and soak up flavors well. To cook rice noodles, soak them in hot water until soft. Then, follow the same steps as the regular noodles. This way, everyone can enjoy this tasty dish!
For more details, check out the full recipe.
Storage Info
Refrigeration Instructions
You can store leftover chili garlic noodles in the fridge. Place them in an airtight container. Make sure to cool them down before sealing. They will last about 3-4 days in the fridge. When you are ready to eat, take them out and check for any signs of spoilage.
Freezing Chili Garlic Noodles
Freezing is a great option if you want to keep the noodles longer. First, let the noodles cool completely. Then, portion them into freezer-safe bags. Squeeze out as much air as you can before sealing. You can freeze the noodles for up to 2 months. Just remember, the texture may change a bit after thawing.
Reheating Guidelines
To reheat chili garlic noodles, you can use various methods. The microwave is the quickest option. Place the noodles in a bowl, add a splash of water, and cover. Heat in 30-second intervals, stirring in between until warm. You can also reheat them in a skillet. Add a little oil and stir-fry until heated through. If you want, add a touch more chili paste or soy sauce for extra flavor.
For the full recipe, check out the Chili Garlic Noodles section!
FAQs
What can I serve with Chili Garlic Noodles?
Chili garlic noodles pair well with many dishes. You can serve them with:
– Grilled chicken
– Stir-fried vegetables
– Spring rolls
– Tofu dishes
– A light salad
These options add variety and balance to your meal. The noodles shine with simple sides.
Can I use store-bought noodles?
Yes, you can use store-bought noodles. They save time and are easy to find. Choose options like:
– Instant ramen
– Fresh egg noodles
– Rice noodles
Just follow the package instructions for cooking. This way, you can enjoy quick, tasty noodles.
How to make Chili Garlic Noodles less spicy?
To reduce the heat, you can adjust the chili paste. Try these tips:
– Use less chili paste
– Add more sugar
– Include coconut milk for creaminess
Taste as you go. This helps you find the perfect spice level.
Is this recipe suitable for meal prep?
Yes, this recipe works great for meal prep. You can store leftovers in airtight containers. Keep them in the fridge for up to three days. When reheating, add a splash of water to prevent drying. This keeps your noodles flavorful and fresh. For the full recipe, check back at the top!
We talked about making delicious Chili Garlic Noodles. I shared the key ingredients and substitutions. You learned how to cook the noodles, sauce, and aromatics step by step. I provided tips on spice levels and cooking oils for the best flavor. We also explored fun variations for different diets and storage tips.
In conclusion, enjoy crafting this dish your way. Customize it and make it yours. Happy cooking!
![To make a great creamy tomato basil soup, you need basic ingredients. Here’s what you’ll need: - 2 tablespoons olive oil - 1 medium onion, finely chopped - 3 cloves garlic, minced - 2 cans (14 oz each) crushed tomatoes - 2 cups vegetable broth - 1 teaspoon granulated sugar - 1 teaspoon dried oregano - 1 teaspoon salt (adjust to personal preference) - 1/2 teaspoon freshly ground black pepper - 1 cup heavy cream (or coconut cream for a dairy-free alternative) - 1/4 cup fresh basil leaves, roughly chopped - 1 tablespoon freshly squeezed lemon juice These ingredients create a rich and comforting soup. The olive oil gives a smooth base, while the onion and garlic add depth. Crushed tomatoes bring sweetness and acidity, balanced perfectly by sugar and herbs. The cream makes it silky, and the basil adds freshness. If you want to play with the flavors, here are some optional ingredients: - A pinch of red pepper flakes for heat - A sprinkle of grated Parmesan cheese for extra richness - A dash of balsamic vinegar for added tang - Fresh spinach or kale for extra nutrients These options let you customize your soup. Feel free to mix and match based on your taste. You can easily adapt this soup for different diets: - For a vegan version, use coconut cream and vegetable broth. - If you are gluten-free, make sure the vegetable broth is certified gluten-free. - You can swap heavy cream with cashew cream for a nutty flavor. These substitutions keep the soup delicious while meeting your dietary needs. You can find the Full Recipe for more details on preparation. 1. Sauté the Aromatics: First, take a large pot and heat the olive oil over medium heat. Add the finely chopped onion. Cook it for about 5 minutes until the onion turns soft and clear. 2. Add Garlic: Next, stir in the minced garlic. Cook for another minute, stirring often. You want the garlic to smell good but not brown. 3. Combine Main Ingredients: Now, pour in the crushed tomatoes and vegetable broth. Add the sugar, oregano, salt, and black pepper. Mix everything well. 4. Simmer the Soup: Turn up the heat to bring the mix to a gentle boil. Once it boils, lower the heat and let it simmer for 15 to 20 minutes. This step makes the flavors blend well. 5. Blend to Perfection: After simmering, use an immersion blender to blend the soup until smooth. If you do not have one, pour the soup in batches into a regular blender. Be careful, as it will be hot! 6. Add Creaminess: Once blended, return the soup to low heat in the pot. Stir in the heavy cream or coconut cream and let it warm up. 7. Finish with Freshness: Add the chopped basil and lemon juice. Let the soup cook for another 5 minutes. This adds fresh flavor. Taste it and adjust salt and pepper if needed. 8. Cool and Serve: Remove the pot from heat and let it cool a bit. This helps the flavors to deepen. - If using a countertop blender, fill it halfway to avoid overflow. - Blend in batches for a smooth texture. - If you like some chunks, blend only half the soup. - Pour the soup into deep bowls. - Top with more fresh basil and a drizzle of olive oil. - Serve with crusty bread on the side for dipping. - This makes your meal feel special and cozy. For the full recipe, refer to the earlier section. To make your creamy tomato basil soup shine, focus on fresh herbs. Fresh basil adds a bright taste. You can also try adding a pinch of red pepper flakes for heat. A dash of balsamic vinegar gives depth. Using high-quality tomatoes is key too. They set the soup's base flavor. One common mistake is overcooking the garlic. When it burns, it turns bitter. Keep an eye on it and only cook until fragrant. Another mistake is not blending enough. A smooth texture is ideal for this soup. Lastly, don’t skip the sugar. It balances the acidity of the tomatoes. To save time, chop your onions and garlic in advance. You can also use canned tomatoes. They are just as tasty and save prep time. If you need a quick meal, skip the blending step. Serve it chunky for a rustic style. Enjoy the soup with crusty bread for a full meal. You can find the full recipe above to guide you through each step. {{image_4}} You can easily make this soup dairy-free. Simply swap heavy cream for coconut cream. Coconut cream gives a rich texture without the dairy. It pairs well with tomatoes and basil. You can also use almond milk or cashew cream for a lighter option. Just add these alternatives at the end, like the heavy cream. To boost nutrition, try adding some veggies. Spinach or kale blends well and adds color. Carrots can also enhance sweetness and health benefits. For protein, add cooked lentils or chickpeas. These options make your soup heartier and more filling. Want some heat? You can add red pepper flakes or chopped jalapeños. Start with a small amount and taste as you go. If you like a smoky flavor, try adding smoked paprika. For a herby twist, mix in thyme or rosemary. Adjust the spices to fit your taste! To store your creamy tomato basil soup, let it cool first. Once cooled, transfer it to an airtight container. This soup stays fresh in the fridge for about 3 to 5 days. Always check for any signs of spoilage before eating. If it looks or smells off, toss it out. For longer storage, freezing is a great option. First, cool the soup completely. Then, pour it into freezer-safe containers, leaving some space at the top for expansion. You can freeze it for up to 3 months. When ready to eat, simply thaw it in the fridge overnight before reheating. When reheating your soup, do it gently. Pour it into a pot and warm it over low heat. Stir often to avoid scorching. If the soup seems too thick, add a little water or broth to thin it out. This keeps the creamy texture smooth and delightful. Enjoy your soup with a nice piece of bread or a fresh salad! Creamy Tomato Basil Soup can last in the fridge for about 3 to 4 days. Make sure to store it in an airtight container. This keeps it fresh and safe to eat. Always check for any signs of spoilage before you dig in. If it looks or smells off, it's best to toss it out. Yes, you can make this soup in advance! It actually tastes better after sitting for a bit. You can prepare it a day or two ahead and keep it in the fridge. Just remember to let it cool completely before storing. This way, the flavors have time to blend together nicely. To reheat creamy tomato soup, pour it into a pot over low heat. Stir it often to avoid burning. If the soup seems too thick, add a splash of water or broth. You can also use a microwave. Just heat it in a microwave-safe bowl and stir every minute until warm. Make sure it’s hot throughout before serving. For the full recipe, you can refer to the [Full Recipe]. This article covered creamy tomato basil soup, from essential ingredients to cooking tips. You learned about variations and how to store your soup properly. Making this dish can be easy and fun. By following the steps and tips, you can create a soup that suits your taste. Don't hesitate to try new flavors or adjustments. Enjoy your cooking, and remember that practice leads to the best soup each time!](https://tastyrecipes.blog/wp-content/uploads/2025/06/3d0a8b75-739c-4ed4-a782-69c09ca61b01-768x768.webp)

. This salad is perfect for lunch or a light dinner. Enjoy every bite! - Preheat the oven to 400°F (200°C). - Spread the chickpeas on a large baking sheet. I love starting with the oven. It gets hot and ready to make the chickpeas crispy. A hot oven helps them roast well. Make sure to spread the chickpeas out. This step is key for even roasting. - Drizzle with olive oil and season with spices. - Roast for 25-30 minutes, shaking the pan halfway through. Now, drizzle olive oil over the chickpeas. Sprinkle smoked paprika and garlic powder on top. These spices add great flavor. Toss them gently to coat well. Roasting takes time, but it’s worth it! Shake the pan halfway to keep them cooking evenly. - Combine mixed greens, cherry tomatoes, cucumber, and red onion. - Whisk tahini, lemon juice, and water to make dressing. While the chickpeas roast, you can start on the salad. In a large bowl, combine your mixed greens, halved cherry tomatoes, diced cucumber, and thinly sliced red onion. Mix them well. For the dressing, whisk tahini, lemon juice, and water together until smooth. If it’s too thick, add a bit more water. - Add roasted chickpeas to the salad. - Drizzle tahini dressing and sprinkle feta (if using). Once the chickpeas are golden brown, let them cool for a few minutes. Then, add them to the salad bowl. Drizzle the tahini dressing over everything. Toss gently to mix. If you like, sprinkle feta on top for a creamy touch. For the full recipe, be sure to check out the detailed instructions. Enjoy your cooking! To get the best crispy chickpeas, start with dry ones. This makes a big difference. Rinse them well and then pat them dry with a clean towel. High heat is key for crispiness. I use 400°F (200°C) in my oven. This helps the chickpeas roast evenly and become golden brown. You can change up your salad by adding more veggies. Bell peppers and carrots add color and crunch. Want extra protein? Grilled chicken works great, or add quinoa for a filling option. This makes the salad heartier and even more satisfying. Spice up your chickpeas with different seasonings. Try cumin or cayenne for a kick. You can also add nuts or seeds to the salad. They bring an extra crunch that really elevates the dish. Each bite becomes a delightful mix of textures and flavors. For the complete recipe, check out the [Full Recipe]. {{image_4}} Using seasonal greens makes your salad fresh and bright. You can choose from arugula, spinach, or romaine. Mix in local veggies based on what you have. If you find fresh radishes, add those for a nice crunch. In summer, try adding fresh corn or zucchini. In the fall, roasted sweet potatoes work great. Always choose what looks best at the market. If you want a vegan salad, skip the feta cheese. You can use a dairy-free cheese if you like. It will still have great taste. Nutritional yeast can add a cheesy flavor without dairy. Just sprinkle it on top before serving. This way, everyone can enjoy a tasty meal. For a heartier dish, add cooked quinoa or farro. These grains give your salad more texture and flavor. You can cook them in advance and store them in the fridge. When ready to eat, mix the grains with the salad. This version makes it perfect for lunch or dinner. Plus, it boosts your protein intake, making it more filling. For the Full Recipe, check the recipe section above for all the details you need. Store your leftover salad in an airtight container for up to 3 days. This keeps it fresh and tasty. I suggest you wait to add the dressing until you are ready to eat. This helps prevent sogginess in your greens. Freezing this salad is not a good idea. The veggies will lose their crunch and flavor. However, you can freeze the chickpeas separately if you want. Just make sure they are dry before you freeze them. To make your life easier, prepare the chickpeas and the dressing ahead of time. You can roast the chickpeas and store them. Keep the dressing in a jar in the fridge. When you are ready to eat, just mix everything together for a quick meal! You can find the Full Recipe for more details on preparation. To make chickpeas crispy, start by drying them well. Drain and rinse them, then pat them dry with a towel. Spread them in a single layer on a baking sheet. Drizzle with olive oil and season. Bake at 400°F for 25-30 minutes. Shake the pan halfway through to ensure even cooking. Aim for a golden brown color for the best crunch. Yes, you can use canned chickpeas. Canned chickpeas save time since they are already cooked. They are easy to find, and you can use them right away. Just drain and rinse them before roasting. Dried chickpeas take longer to prepare, as they need soaking and cooking. Yes, this salad is gluten-free. All the ingredients, including chickpeas, greens, and vegetables, do not contain gluten. Make sure to check labels on any added ingredients, like feta cheese or dressings, to ensure they are gluten-free. If you need a tahini substitute, try using peanut butter or almond butter. You can also make a simple dressing with olive oil, lemon juice, and a bit of yogurt. Each option provides a different flavor but will keep the salad tasty. To make the salad less filling, reduce the amount of chickpeas or feta cheese. You can also add more greens and vegetables to keep it light. For a lighter meal, serve smaller portions or skip the cheese altogether. For the full recipe, check out the Crispy Chickpea Salad section. This blog post shared a simple chickpea salad recipe. You learned how to roast chickpeas, mix fresh veggies, and create a tasty tahini dressing. Remember, you can change ingredients to fit your taste or season. The salad is easy to store and perfect for meal prep. Enjoy your healthy, delicious meal while knowing it’s good for you!](https://tastyrecipes.blog/wp-content/uploads/2025/07/9e0b6a47-2ac7-4201-9559-0136f3c81322-768x768.webp)