
Crispy Baked Chicken Tenders Simple and Delicious Meal
![For my crispy baked chicken tenders, you need: - 1 lb chicken breast tenders - 1 cup whole wheat breadcrumbs - 1/2 cup grated Parmesan cheese - 1 teaspoon garlic powder - 1 teaspoon onion powder - 1 teaspoon smoked paprika - 1/2 teaspoon black pepper - 1/2 teaspoon salt - 2 large eggs - 2 tablespoons Dijon mustard - 1 tablespoon olive oil These ingredients make the tenders crispy and tasty. You can add extra flavor with these optional seasonings: - 1 teaspoon cayenne pepper for heat - 1 teaspoon dried oregano for a herby taste - 1 teaspoon Italian seasoning for more depth Feel free to mix and match to suit your taste! Each serving of these chicken tenders has: - Calories: 320 - Protein: 30g - Carbohydrates: 20g - Fat: 15g These chicken tenders are a healthy choice. For the full recipe, check out the cooking guide! To start, preheat your oven to 425°F (220°C). This high heat helps to create a crispy outer layer. Next, line a baking sheet with parchment paper. This step keeps the tenders from sticking and helps them cook evenly. In a big bowl, mix together one cup of whole wheat breadcrumbs, half a cup of grated Parmesan cheese, one teaspoon of garlic powder, one teaspoon of onion powder, one teaspoon of smoked paprika, half a teaspoon of black pepper, and half a teaspoon of salt. Set this aside. Now, crack two large eggs into another bowl. Whisk them with two tablespoons of Dijon mustard until smooth. This mixture will help the breadcrumbs stick to the chicken. Take each chicken tender and dip it into the egg mixture. Make sure it gets fully coated. Then, shake off the extra liquid and roll it in the breadcrumb mix. Press gently so the crumbs stick well. Place the coated chicken tenders on the baking sheet with space between them. To get that extra crispy texture, drizzle one tablespoon of olive oil over the top. Bake the tenders for 15 to 20 minutes. Flip them halfway to ensure even browning. They are ready when they are golden brown and reach an internal temperature of 165°F (74°C). To achieve the best crispiness, use whole wheat breadcrumbs. They provide a great texture. Don’t skip the olive oil drizzle; it helps the tenders brown nicely. Also, make sure the chicken tenders are not crowded on the baking sheet. Proper air flow is key for crispiness. If you want an even crunchier finish, try broiling the tenders for the last 2-3 minutes. Just watch them closely to prevent burning! Imagine your kitchen filled with rich aromas while those chicken tenders bake. Picture the golden-brown crust forming on each tender. As they cook, you’ll see the crispiness develop. When they are finished, let them rest for a few minutes. This time lets the juices settle in, making each bite juicy and tender. For a complete recipe, click on [Full Recipe]. When making crispy baked chicken tenders, avoid these common mistakes: - Not drying the chicken: Wet chicken will not crisp up well. Pat it dry with paper towels. - Skipping the egg wash: The egg mixture helps the breadcrumbs stick. Don't skip this step. - Overcrowding the baking sheet: Space out the tenders to allow hot air to circulate. This helps them cook evenly. - Not flipping the tenders: Flip them halfway through baking for an even golden color. To ensure your chicken is perfectly cooked: - Use a meat thermometer: Check the internal temperature. It should reach 165°F (74°C). - Choose even-sized tenders: This helps them cook at the same rate. - Avoid opening the oven too often: Each time you open the door, the heat escapes. Keep it closed for even cooking. Dipping sauces can elevate your chicken tenders. Here are a few favorites: - Honey mustard: A sweet and tangy option. - Ranch dressing: Creamy and herby, it pairs well with chicken. - Buffalo sauce: For those who like heat, this spicy option is perfect. - Barbecue sauce: A classic choice that adds a smoky flavor. For a full recipe, check the [Full Recipe] section and enjoy the process of making these tasty chicken tenders! {{image_4}} If you like heat, try adding spices. You can mix cayenne pepper or chili powder into the breadcrumb mix. This adds a kick to the crispy coating. You can also use hot sauce in the egg mixture. Just a few drops can spice things up nicely. For a gluten-free version, swap whole wheat breadcrumbs for gluten-free ones. You can use crushed cornflakes or almond flour. Both options give a tasty crunch. Ensure all other ingredients are gluten-free, too. This way, everyone can enjoy these tenders. Experiment with different coatings to keep things exciting. Try using crushed potato chips or panko breadcrumbs for a lighter texture. You can also mix herbs like Italian seasoning or dried basil into the coating. Each change can give a new flavor twist. For the full recipe, check out the details above. After enjoying your crispy baked chicken tenders, you may have some left. To store them, let the tenders cool down first. Place them in an airtight container. This keeps them fresh and safe. You can keep them in the fridge for up to three days. If you want to enjoy them later, consider freezing them. Reheating chicken tenders can be tricky. You want them crispy, not soggy. To do this, heat your oven to 375°F (190°C). Place the tenders on a baking sheet lined with parchment paper. Bake for about 10-15 minutes. Flip them halfway through for even crispiness. You can also use an air fryer for a quick and crunchy option. Freezing is a great way to keep your chicken tenders for longer. First, let them cool completely. Next, place them in a single layer on a baking sheet and freeze for 1-2 hours. Once frozen, transfer them to a freezer-safe bag or container. They can last up to three months in the freezer. When you're ready to eat, just reheat as mentioned above. Enjoy your delicious meal anytime! Crispy baked chicken tenders take about 15 to 20 minutes to bake. I recommend setting your oven to 425°F (220°C) for the best results. Thin tenders cook faster, while thicker ones may need a bit more time. Always check for a golden brown color and ensure the internal temperature reaches 165°F (74°C). This way, you know they are both safe and tasty. Yes, you can use frozen chicken tenders! Just remember to thaw them first. It’s best to let them sit in the fridge overnight. If you're in a hurry, you can use the microwave. Once thawed, follow the same steps as if you were using fresh tenders. Adjust your baking time if needed, as they may require a few extra minutes to cook through. Crispy baked chicken tenders pair well with many sides. Here are some ideas: - Fresh salad with mixed greens - Steamed broccoli or green beans - Sweet potato fries - Classic coleslaw - Macaroni and cheese - Dipping sauces like honey mustard or ranch These sides make your meal balanced and more fun. For a complete recipe, check the [Full Recipe]. In this blog post, we explored the essential ingredients for chicken tenders and how to cook them perfectly. We covered tips to ensure a crispy finish and shared common mistakes to avoid. We also looked at tasty variations, storage info, and answered FAQs. Perfect chicken tenders are within your reach. With a few tricks, you can impress anyone. Enjoy your cooking and the delicious results!](https://tastyrecipes.blog/wp-content/uploads/2025/06/fa7849e2-4dbe-40b9-85b5-9d4524545ebb.webp)
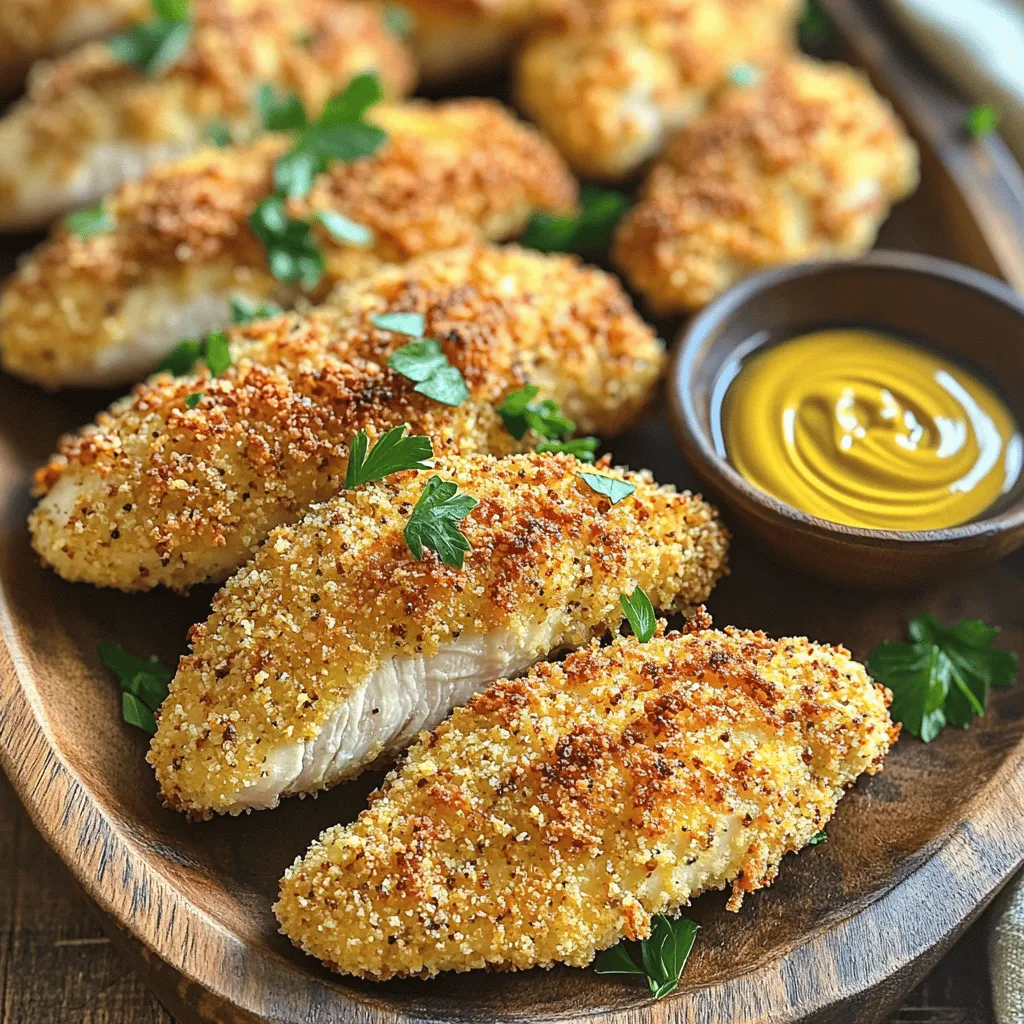
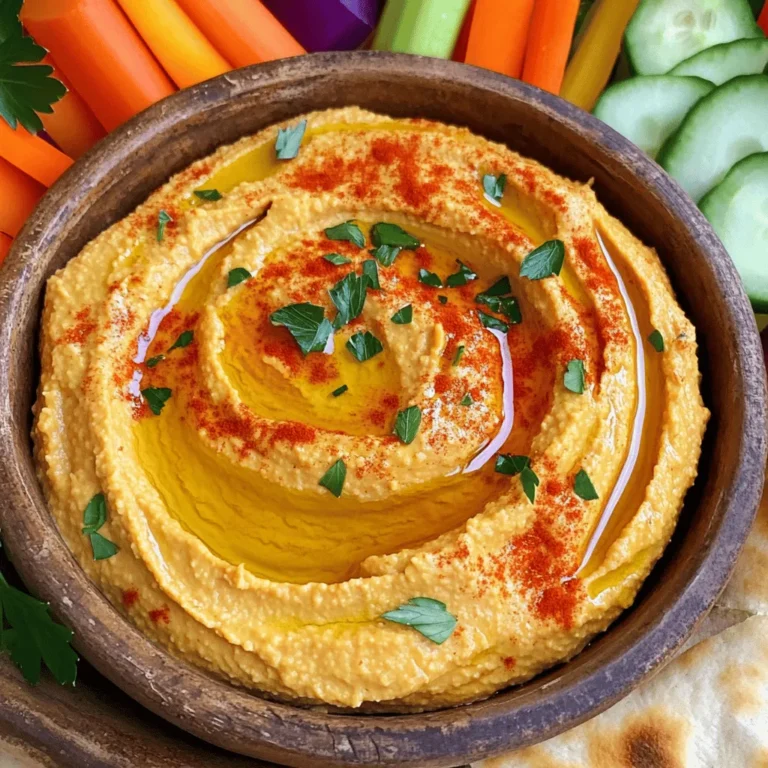
If you crave a meal that’s both simple and delicious, look no further! Crispy Baked Chicken Tenders are the perfect dish to satisfy your taste buds. With just a few ingredients, you can whip up tender, crunchy chicken that everyone will love. Say goodbye to greasy frying and hello to a healthier way of enjoying your favorite comfort food. Let’s dive into this easy recipe and make your next meal a hit!
Ingredients
Main Ingredients List
For my crispy baked chicken tenders, you need:
– 1 lb chicken breast tenders
– 1 cup whole wheat breadcrumbs
– 1/2 cup grated Parmesan cheese
– 1 teaspoon garlic powder
– 1 teaspoon onion powder
– 1 teaspoon smoked paprika
– 1/2 teaspoon black pepper
– 1/2 teaspoon salt
– 2 large eggs
– 2 tablespoons Dijon mustard
– 1 tablespoon olive oil
These ingredients make the tenders crispy and tasty.
Optional Seasonings
You can add extra flavor with these optional seasonings:
– 1 teaspoon cayenne pepper for heat
– 1 teaspoon dried oregano for a herby taste
– 1 teaspoon Italian seasoning for more depth
Feel free to mix and match to suit your taste!
Nutritional Information
Each serving of these chicken tenders has:
– Calories: 320
– Protein: 30g
– Carbohydrates: 20g
– Fat: 15g
These chicken tenders are a healthy choice. For the full recipe, check out the cooking guide!
Step-by-Step Instructions
Preparation and Cooking Method
To start, preheat your oven to 425°F (220°C). This high heat helps to create a crispy outer layer. Next, line a baking sheet with parchment paper. This step keeps the tenders from sticking and helps them cook evenly.
In a big bowl, mix together one cup of whole wheat breadcrumbs, half a cup of grated Parmesan cheese, one teaspoon of garlic powder, one teaspoon of onion powder, one teaspoon of smoked paprika, half a teaspoon of black pepper, and half a teaspoon of salt. Set this aside.
Now, crack two large eggs into another bowl. Whisk them with two tablespoons of Dijon mustard until smooth. This mixture will help the breadcrumbs stick to the chicken.
Take each chicken tender and dip it into the egg mixture. Make sure it gets fully coated. Then, shake off the extra liquid and roll it in the breadcrumb mix. Press gently so the crumbs stick well.
Place the coated chicken tenders on the baking sheet with space between them. To get that extra crispy texture, drizzle one tablespoon of olive oil over the top.
Bake the tenders for 15 to 20 minutes. Flip them halfway to ensure even browning. They are ready when they are golden brown and reach an internal temperature of 165°F (74°C).
Tips for Ensuring Crispy Texture
To achieve the best crispiness, use whole wheat breadcrumbs. They provide a great texture. Don’t skip the olive oil drizzle; it helps the tenders brown nicely. Also, make sure the chicken tenders are not crowded on the baking sheet. Proper air flow is key for crispiness.
If you want an even crunchier finish, try broiling the tenders for the last 2-3 minutes. Just watch them closely to prevent burning!
Visual Guide: Cooking Process
Imagine your kitchen filled with rich aromas while those chicken tenders bake. Picture the golden-brown crust forming on each tender. As they cook, you’ll see the crispiness develop. When they are finished, let them rest for a few minutes. This time lets the juices settle in, making each bite juicy and tender.
For a complete recipe, click on [Full Recipe].
Tips & Tricks
Common Mistakes to Avoid
When making crispy baked chicken tenders, avoid these common mistakes:
– Not drying the chicken: Wet chicken will not crisp up well. Pat it dry with paper towels.
– Skipping the egg wash: The egg mixture helps the breadcrumbs stick. Don’t skip this step.
– Overcrowding the baking sheet: Space out the tenders to allow hot air to circulate. This helps them cook evenly.
– Not flipping the tenders: Flip them halfway through baking for an even golden color.
How to Achieve Perfectly Cooked Chicken
To ensure your chicken is perfectly cooked:
– Use a meat thermometer: Check the internal temperature. It should reach 165°F (74°C).
– Choose even-sized tenders: This helps them cook at the same rate.
– Avoid opening the oven too often: Each time you open the door, the heat escapes. Keep it closed for even cooking.
Recommended Dipping Sauces
Dipping sauces can elevate your chicken tenders. Here are a few favorites:
– Honey mustard: A sweet and tangy option.
– Ranch dressing: Creamy and herby, it pairs well with chicken.
– Buffalo sauce: For those who like heat, this spicy option is perfect.
– Barbecue sauce: A classic choice that adds a smoky flavor.
For a full recipe, check the [Full Recipe] section and enjoy the process of making these tasty chicken tenders!
Variations
Spicy Versions of Chicken Tenders
If you like heat, try adding spices. You can mix cayenne pepper or chili powder into the breadcrumb mix. This adds a kick to the crispy coating. You can also use hot sauce in the egg mixture. Just a few drops can spice things up nicely.
Gluten-Free Options
For a gluten-free version, swap whole wheat breadcrumbs for gluten-free ones. You can use crushed cornflakes or almond flour. Both options give a tasty crunch. Ensure all other ingredients are gluten-free, too. This way, everyone can enjoy these tenders.
Baked Tenders with Different Coatings
Experiment with different coatings to keep things exciting. Try using crushed potato chips or panko breadcrumbs for a lighter texture. You can also mix herbs like Italian seasoning or dried basil into the coating. Each change can give a new flavor twist.
For the full recipe, check out the details above.
Storage Info
How to Store Leftovers
After enjoying your crispy baked chicken tenders, you may have some left. To store them, let the tenders cool down first. Place them in an airtight container. This keeps them fresh and safe. You can keep them in the fridge for up to three days. If you want to enjoy them later, consider freezing them.
Reheating Tips for Maximum Crispiness
Reheating chicken tenders can be tricky. You want them crispy, not soggy. To do this, heat your oven to 375°F (190°C). Place the tenders on a baking sheet lined with parchment paper. Bake for about 10-15 minutes. Flip them halfway through for even crispiness. You can also use an air fryer for a quick and crunchy option.
Freezing Chicken Tenders
Freezing is a great way to keep your chicken tenders for longer. First, let them cool completely. Next, place them in a single layer on a baking sheet and freeze for 1-2 hours. Once frozen, transfer them to a freezer-safe bag or container. They can last up to three months in the freezer. When you’re ready to eat, just reheat as mentioned above. Enjoy your delicious meal anytime!
FAQs
How long do chicken tenders take to bake?
Crispy baked chicken tenders take about 15 to 20 minutes to bake. I recommend setting your oven to 425°F (220°C) for the best results. Thin tenders cook faster, while thicker ones may need a bit more time. Always check for a golden brown color and ensure the internal temperature reaches 165°F (74°C). This way, you know they are both safe and tasty.
Can I use frozen chicken tenders?
Yes, you can use frozen chicken tenders! Just remember to thaw them first. It’s best to let them sit in the fridge overnight. If you’re in a hurry, you can use the microwave. Once thawed, follow the same steps as if you were using fresh tenders. Adjust your baking time if needed, as they may require a few extra minutes to cook through.
What can I serve with crispy baked chicken tenders?
Crispy baked chicken tenders pair well with many sides. Here are some ideas:
– Fresh salad with mixed greens
– Steamed broccoli or green beans
– Sweet potato fries
– Classic coleslaw
– Macaroni and cheese
– Dipping sauces like honey mustard or ranch
These sides make your meal balanced and more fun. For a complete recipe, check the [Full Recipe].
In this blog post, we explored the essential ingredients for chicken tenders and how to cook them perfectly. We covered tips to ensure a crispy finish and shared common mistakes to avoid. We also looked at tasty variations, storage info, and answered FAQs.
Perfect chicken tenders are within your reach. With a few tricks, you can impress anyone. Enjoy your cooking and the delicious results!
![For my crispy baked chicken tenders, you need: - 1 lb chicken breast tenders - 1 cup whole wheat breadcrumbs - 1/2 cup grated Parmesan cheese - 1 teaspoon garlic powder - 1 teaspoon onion powder - 1 teaspoon smoked paprika - 1/2 teaspoon black pepper - 1/2 teaspoon salt - 2 large eggs - 2 tablespoons Dijon mustard - 1 tablespoon olive oil These ingredients make the tenders crispy and tasty. You can add extra flavor with these optional seasonings: - 1 teaspoon cayenne pepper for heat - 1 teaspoon dried oregano for a herby taste - 1 teaspoon Italian seasoning for more depth Feel free to mix and match to suit your taste! Each serving of these chicken tenders has: - Calories: 320 - Protein: 30g - Carbohydrates: 20g - Fat: 15g These chicken tenders are a healthy choice. For the full recipe, check out the cooking guide! To start, preheat your oven to 425°F (220°C). This high heat helps to create a crispy outer layer. Next, line a baking sheet with parchment paper. This step keeps the tenders from sticking and helps them cook evenly. In a big bowl, mix together one cup of whole wheat breadcrumbs, half a cup of grated Parmesan cheese, one teaspoon of garlic powder, one teaspoon of onion powder, one teaspoon of smoked paprika, half a teaspoon of black pepper, and half a teaspoon of salt. Set this aside. Now, crack two large eggs into another bowl. Whisk them with two tablespoons of Dijon mustard until smooth. This mixture will help the breadcrumbs stick to the chicken. Take each chicken tender and dip it into the egg mixture. Make sure it gets fully coated. Then, shake off the extra liquid and roll it in the breadcrumb mix. Press gently so the crumbs stick well. Place the coated chicken tenders on the baking sheet with space between them. To get that extra crispy texture, drizzle one tablespoon of olive oil over the top. Bake the tenders for 15 to 20 minutes. Flip them halfway to ensure even browning. They are ready when they are golden brown and reach an internal temperature of 165°F (74°C). To achieve the best crispiness, use whole wheat breadcrumbs. They provide a great texture. Don’t skip the olive oil drizzle; it helps the tenders brown nicely. Also, make sure the chicken tenders are not crowded on the baking sheet. Proper air flow is key for crispiness. If you want an even crunchier finish, try broiling the tenders for the last 2-3 minutes. Just watch them closely to prevent burning! Imagine your kitchen filled with rich aromas while those chicken tenders bake. Picture the golden-brown crust forming on each tender. As they cook, you’ll see the crispiness develop. When they are finished, let them rest for a few minutes. This time lets the juices settle in, making each bite juicy and tender. For a complete recipe, click on [Full Recipe]. When making crispy baked chicken tenders, avoid these common mistakes: - Not drying the chicken: Wet chicken will not crisp up well. Pat it dry with paper towels. - Skipping the egg wash: The egg mixture helps the breadcrumbs stick. Don't skip this step. - Overcrowding the baking sheet: Space out the tenders to allow hot air to circulate. This helps them cook evenly. - Not flipping the tenders: Flip them halfway through baking for an even golden color. To ensure your chicken is perfectly cooked: - Use a meat thermometer: Check the internal temperature. It should reach 165°F (74°C). - Choose even-sized tenders: This helps them cook at the same rate. - Avoid opening the oven too often: Each time you open the door, the heat escapes. Keep it closed for even cooking. Dipping sauces can elevate your chicken tenders. Here are a few favorites: - Honey mustard: A sweet and tangy option. - Ranch dressing: Creamy and herby, it pairs well with chicken. - Buffalo sauce: For those who like heat, this spicy option is perfect. - Barbecue sauce: A classic choice that adds a smoky flavor. For a full recipe, check the [Full Recipe] section and enjoy the process of making these tasty chicken tenders! {{image_4}} If you like heat, try adding spices. You can mix cayenne pepper or chili powder into the breadcrumb mix. This adds a kick to the crispy coating. You can also use hot sauce in the egg mixture. Just a few drops can spice things up nicely. For a gluten-free version, swap whole wheat breadcrumbs for gluten-free ones. You can use crushed cornflakes or almond flour. Both options give a tasty crunch. Ensure all other ingredients are gluten-free, too. This way, everyone can enjoy these tenders. Experiment with different coatings to keep things exciting. Try using crushed potato chips or panko breadcrumbs for a lighter texture. You can also mix herbs like Italian seasoning or dried basil into the coating. Each change can give a new flavor twist. For the full recipe, check out the details above. After enjoying your crispy baked chicken tenders, you may have some left. To store them, let the tenders cool down first. Place them in an airtight container. This keeps them fresh and safe. You can keep them in the fridge for up to three days. If you want to enjoy them later, consider freezing them. Reheating chicken tenders can be tricky. You want them crispy, not soggy. To do this, heat your oven to 375°F (190°C). Place the tenders on a baking sheet lined with parchment paper. Bake for about 10-15 minutes. Flip them halfway through for even crispiness. You can also use an air fryer for a quick and crunchy option. Freezing is a great way to keep your chicken tenders for longer. First, let them cool completely. Next, place them in a single layer on a baking sheet and freeze for 1-2 hours. Once frozen, transfer them to a freezer-safe bag or container. They can last up to three months in the freezer. When you're ready to eat, just reheat as mentioned above. Enjoy your delicious meal anytime! Crispy baked chicken tenders take about 15 to 20 minutes to bake. I recommend setting your oven to 425°F (220°C) for the best results. Thin tenders cook faster, while thicker ones may need a bit more time. Always check for a golden brown color and ensure the internal temperature reaches 165°F (74°C). This way, you know they are both safe and tasty. Yes, you can use frozen chicken tenders! Just remember to thaw them first. It’s best to let them sit in the fridge overnight. If you're in a hurry, you can use the microwave. Once thawed, follow the same steps as if you were using fresh tenders. Adjust your baking time if needed, as they may require a few extra minutes to cook through. Crispy baked chicken tenders pair well with many sides. Here are some ideas: - Fresh salad with mixed greens - Steamed broccoli or green beans - Sweet potato fries - Classic coleslaw - Macaroni and cheese - Dipping sauces like honey mustard or ranch These sides make your meal balanced and more fun. For a complete recipe, check the [Full Recipe]. In this blog post, we explored the essential ingredients for chicken tenders and how to cook them perfectly. We covered tips to ensure a crispy finish and shared common mistakes to avoid. We also looked at tasty variations, storage info, and answered FAQs. Perfect chicken tenders are within your reach. With a few tricks, you can impress anyone. Enjoy your cooking and the delicious results!](https://tastyrecipes.blog/wp-content/uploads/2025/06/fa7849e2-4dbe-40b9-85b5-9d4524545ebb-300x300.webp)
![- 3 medium zucchinis - 1 cup whole wheat breadcrumbs - 1 cup freshly grated Parmesan cheese - 1 teaspoon garlic powder - 1 teaspoon Italian seasoning - 1 teaspoon smoked paprika - Salt and freshly cracked pepper - 2 large eggs - Olive oil spray These ingredients come together to create a snack that is both crispy and tasty. Zucchini is a great vegetable. It has a mild taste and is low in calories. Whole wheat breadcrumbs add crunch and fiber. Parmesan cheese gives a rich flavor that everyone loves. The spices like garlic powder and Italian seasoning add more depth to the dish. Smoked paprika brings a nice smokiness. Don't forget the salt and pepper to enhance all the flavors. - Extra Parmesan cheese - Fresh herbs (like parsley or basil) You can add extra Parmesan cheese on top for a cheesy kick. Fresh herbs like parsley or basil also make a great garnish. They add a fresh taste and make your dish look pretty. For the full recipe, check out the instructions on how to make these delicious Baked Parmesan Zucchini Fries. 1. Preheat your oven to 425°F (220°C). This temperature helps the fries get crispy. 2. Line a baking sheet with parchment paper. This keeps the fries from sticking and makes cleanup easy. 1. In a large bowl, mix together the breadcrumbs, grated Parmesan cheese, garlic powder, Italian seasoning, smoked paprika, salt, and pepper. Stir until all is combined. 2. In another bowl, whisk the eggs until they are light and frothy. This will act as your egg wash. 3. Take each zucchini fry and dip it into the egg wash. Make sure it is fully coated, letting the extra egg drip off. 4. Roll the egg-coated fry in the breadcrumb mix. Press gently to help the coating stick well. 1. Place the coated zucchini fries on the baking sheet in a single layer. Make sure they are not crowded. 2. Lightly spray the tops with olive oil. This helps them get that perfect crispy texture. 3. Bake in the oven for about 20-25 minutes. Turn the fries halfway through to ensure they cook evenly. 4. They should be golden brown and crispy when ready. Enjoy your fries hot, straight from the oven. For the full recipe, check the instructions provided above. To make your zucchini fries nice and crispy, use whole wheat breadcrumbs. This adds a great crunch. Before baking, lightly spray the fries with olive oil. This simple step helps them crisp up perfectly. These zucchini fries taste amazing with marinara sauce. The sauce adds a nice tangy flavor. You can also sprinkle fresh herbs on top. Fresh herbs like parsley or basil enhance the dish’s taste and look. One big mistake is overcrowding the baking sheet. If the fries are too close, they won’t cook evenly. Make sure to leave space between each fry. Another mistake is not preheating the oven properly. A hot oven ensures your fries bake correctly and get that golden finish. {{image_4}} You can easily change the flavor of your zucchini fries. Try adding different seasonings to the breadcrumb mix. Cajun spices add heat and zest. For a spicy kick, sprinkle in some cayenne pepper. If you want something milder, use Italian herbs. You can also switch up the cheese. Instead of Parmesan, try cheddar for a sharp taste. Mozzarella can give a nice gooey texture. Each option brings a unique twist to this tasty snack. If you need a gluten-free option, you can make simple swaps. Instead of regular breadcrumbs, use ground almonds. They provide a nice crunch and great flavor. Gluten-free breadcrumbs work well too. Just ensure they are finely crushed for the best coating. This way, everyone can enjoy these zucchini fries without worry. You can expand the veggie fun by adding other vegetables. Eggplant works well and has a similar texture. Sweet potato adds a hint of sweetness that pairs nicely with the cheese. Cut them into fry shapes just like the zucchini. Coat and bake them the same way. This gives you a colorful plate and more flavors to enjoy. For the full recipe, check out the detailed instructions above. Enjoy the process of trying different flavors and veggies! To store baked zucchini fries in the fridge, place them in an airtight container. This keeps them fresh and tasty. Enjoy the fries within 3 days for the best flavor. Make sure they cool down before sealing. This prevents steam from making them soggy. To reheat zucchini fries while keeping them crispy, use an oven or air fryer. Preheat your oven to 375°F (190°C). Place the fries on a baking sheet. Bake for about 10 minutes, or until hot. If using an air fryer, set it to 350°F (175°C) for 5 to 7 minutes. This helps restore their crunch. Yes, you can freeze zucchini fries! Freezing them is easy. First, let the fries cool completely. Then, spread them out on a baking sheet. Freeze for about 1 hour. Once frozen, transfer them to a freezer bag. Label the bag with the date. Use within 2 months for the best quality. To reuse, bake from frozen at 425°F (220°C) for about 25-30 minutes. This keeps them crispy and tasty. For the full recipe and more tips, check out the [Full Recipe]. To make zucchini fries crispy, you can follow these tips: - Use whole wheat breadcrumbs: They provide a nice crunch. - Lightly spray with olive oil: This helps achieve that golden, crispy finish. - Do not overcrowd the baking sheet: Give them space to cook evenly. - Turn them halfway: This ensures all sides get nice and crispy. These steps will help you enjoy perfectly crunchy zucchini fries each time. Yes, you can bake zucchini fries without breadcrumbs. Here are some alternatives: - Almond flour or ground nuts: These add crunch without gluten. - Cornmeal: It offers a different texture and flavor. - Crushed cornflakes: They create a very crispy coating. These options can change the texture while keeping your fries tasty. Zucchini is low in calories and full of nutrients. Here are some benefits: - High in fiber: This helps with digestion. - Rich in vitamins: It contains vitamin C and vitamin A. - Hydrating: Zucchini has a high water content. - Low in carbs: Great for low-carb diets. Including zucchini in your meals can enhance your diet. Baked Parmesan zucchini fries last about 3-4 days in the fridge. Here’s how to store them: - Keep in an airtight container: This helps maintain freshness. - Look for spoilage signs: Check for any off smells or sliminess. When stored properly, you can enjoy your delicious fries for days! In this blog post, we explored how to make delicious baked zucchini fries. We covered the key ingredients and shared step-by-step instructions to guide you through the process. I also provided tips for getting that perfect crunch and ways to vary the recipe. Remember to store leftovers properly, and feel free to experiment with flavors. Baked zucchini fries are a tasty and healthy snack you can enjoy anytime. With this guide, you have everything you need for a successful cooking experience. Now it's time to enjoy your creation!](https://tastyrecipes.blog/wp-content/uploads/2025/07/a3f0f870-b1ec-4797-bd27-3c0957e6e1bf-768x768.webp)
![To make these tasty knots, gather these ingredients: - 1 package (16 oz) refrigerated pizza dough - 4 tablespoons unsalted butter, melted - 3 cloves of garlic, finely minced - 1/2 cup freshly grated Parmesan cheese - 1 teaspoon dried Italian herbs (like oregano, basil, or thyme) - 1/4 teaspoon red pepper flakes (optional, for a little extra heat) - A pinch of salt, to taste - Fresh parsley, chopped, for garnish You can swap store-bought pizza dough for homemade dough if you prefer. Use any cheese you like, such as mozzarella or cheddar, for a different flavor. If you don’t have fresh garlic, garlic powder works too. For the herbs, dried ones are fine. If you want a kick, add more red pepper flakes or crushed black pepper. Fresh parsley adds a nice touch, but you can skip it if you want. Choose pizza dough that is near its expiration date. This helps ensure it’s soft and easy to work with. When picking garlic, look for firm bulbs without any sprouts or soft spots. For Parmesan cheese, choose a block you can grate yourself for the best flavor. If you buy pre-grated cheese, check the packaging for a good date. Fresh parsley should be vibrant and not wilted. These small details make a big difference in taste! Start by preheating your oven to 400°F (200°C). This helps the knots bake evenly. Next, grab a clean surface and lightly sprinkle it with flour. Roll out the pizza dough into a rectangle. Aim for a thickness of about 1/4 inch. This thickness gives the knots a nice, fluffy texture. Once you have your rectangle, cut the dough into strips. Each strip should measure about 1 inch wide and 6 inches long. This size is perfect for knot formation. Now comes the fun part: making the knots! For each strip, twist it gently and tuck one end through the loop. This creates a beautiful knot shape. Place these knots on a baking sheet lined with parchment paper. Make sure to leave space between each knot. This space allows them to rise and bake without sticking together. In a small bowl, combine melted butter, minced garlic, dried Italian herbs, red pepper flakes, and a pinch of salt. Mix this until it's well blended. This garlic butter mixture is key to flavor. Generously brush this mixture over each knot. Make sure every part is coated. This ensures your knots soak up all the deliciousness. After brushing, sprinkle freshly grated Parmesan cheese on top of each knot. This will melt and add a lovely, cheesy crust. Now, place the baking sheet in the oven. Bake for 15-20 minutes or until the knots turn golden brown. Once they’re done, let them cool for a few minutes. Finally, garnish with chopped parsley for that fresh flavor. Enjoy your Easy Garlic Parmesan Knots! For the full recipe, check out the [Full Recipe]. To make soft and fluffy garlic knots, you need to handle the dough gently. When you roll out the pizza dough, keep it about 1/4 inch thick. Cutting strips too thin can lead to crispy knots, which is not what we want. Always twist your knots tightly to ensure they hold their shape during baking. To enhance the flavor, use fresh garlic when making your garlic butter. Freshly minced garlic gives a strong, bold taste that dried garlic cannot match. Also, use high-quality Parmesan cheese for a rich, nutty flavor. If you like a bit of heat, add red pepper flakes. This little kick makes the knots even better. Bake your garlic knots at 400°F (200°C) for the best results. This temperature helps them rise nicely and get golden brown. Keep an eye on them after 15 minutes. Ovens can vary, so check for a golden color. If they need more time, add a few extra minutes. Always let them cool for a couple of minutes before serving. This lets the flavors settle and makes them easier to eat. For the full recipe, check the details above. {{image_4}} You can switch up the cheese in your garlic knots. Mozzarella gives a nice, gooey texture. Cheddar adds a sharp flavor. Feta offers a crumbly, salty kick. Each cheese brings its own twist. Try mixing different cheeses for a fun flavor blend. Want to spice things up? Add herbs like rosemary or thyme to your garlic butter. You can also try spices like paprika or cayenne for heat. Fresh basil adds a bright taste. These small changes create a new taste experience. Experiment with what you love! You can make these knots gluten-free easily. Use gluten-free pizza dough instead of regular dough. For a vegan twist, swap butter for oil and use nutritional yeast in place of cheese. These swaps let everyone enjoy your tasty knots. You can still keep them delicious! Check the Full Recipe for more tips. After you bake your garlic parmesan knots, let them cool down. Place any leftovers in an airtight container. This helps keep them fresh. You can store them at room temperature for up to two days. If you want them to last longer, move them to the fridge. They will stay good for about a week in there. When you are ready to enjoy your leftover knots, reheating them is easy. Preheat your oven to 350°F (175°C). Place the knots on a baking sheet and cover them with foil. This keeps them from drying out. Heat for about 10 minutes or until warm. You can also use a microwave, but they might get a bit chewy. If you have a lot of leftover knots, freezing is a great option. First, let them cool completely. Then, wrap each knot in plastic wrap. Place the wrapped knots in a freezer bag or container. Label the bag with the date. They can stay in the freezer for up to three months. To eat them, thaw in the fridge overnight, then reheat as mentioned above. For the full recipe, check out the details above. Garlic parmesan knots last about 2-3 days at room temperature. Store them in an airtight container to keep them fresh. If you want to extend their life, consider freezing them. They can last up to three months in the freezer. Just make sure to wrap them well to prevent freezer burn. Yes, you can make the dough ahead of time. Just prepare the dough and store it in the fridge for up to 24 hours. When you're ready to bake, let it sit at room temperature for about 30 minutes. This helps it relax and makes it easier to work with. You can serve garlic parmesan knots with marinara sauce for dipping. They also go well with garlic butter or a creamy ranch dressing. Pair them with your favorite pasta dish or a fresh salad for a complete meal. Yes, you can make these knots in advance! Prepare the knots and place them on a baking sheet. Cover them with plastic wrap and refrigerate for up to 2 hours before baking. When you're ready to eat, just take them out, let them sit for a few minutes, then bake as directed. Absolutely! You can use homemade pizza dough for these knots. Just ensure it is well-kneaded and has risen properly. This will give you a nice texture and flavor. You can find the full recipe for garlic parmesan knots using either type of dough. You now have a complete guide for making Easy Garlic Parmesan Knots. We covered the ingredients, step-by-step instructions, and tips for the best results. You learned about variations to suit your taste and how to store any leftovers. With this knowledge, you can create delicious knots each time. Remember, the key is fresh ingredients and proper baking techniques. Enjoy the process and make these knots your own!](https://tastyrecipes.blog/wp-content/uploads/2025/06/4f28ee24-23f7-48a3-a976-812a2e22feda-768x768.webp)