
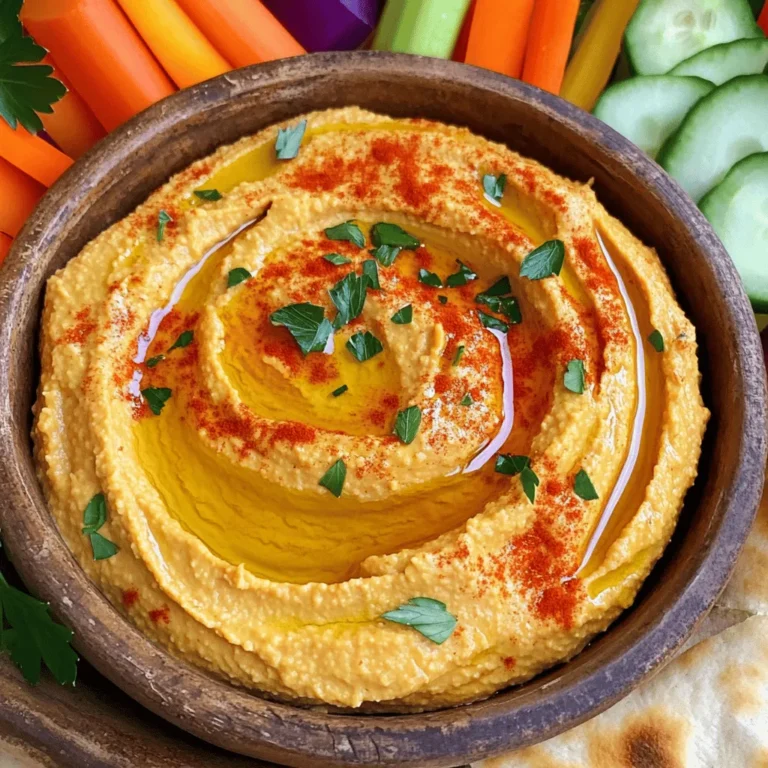
Roasted Garlic Hummus Flavorful Dip for Everyone
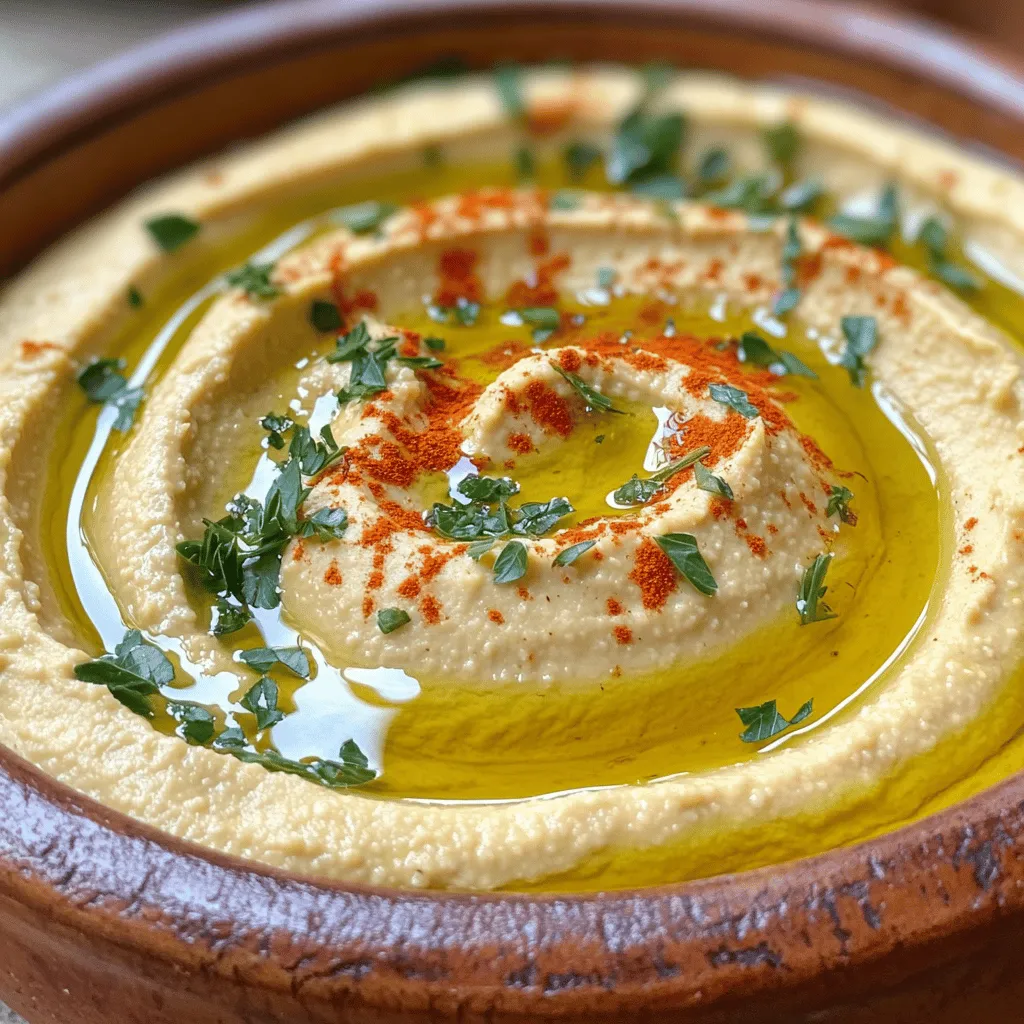
Are you ready to savor a delightful dip that everyone loves? In this post, I will show you how to create a rich Roasted Garlic Hummus that bursts with flavor. Whether you’re snacking or hosting a gathering, this creamy dip fits every occasion. With simple steps and fresh ingredients, you can whip up a treat that will impress your friends and family. Let’s dive into the world of hummus!
Ingredients
Main Ingredients for Roasted Garlic Hummus
To make roasted garlic hummus, you need some key items:
– 1 cup dried chickpeas (or 2 cans of chickpeas, rinsed and drained)
– 1 head of garlic
– 1/4 cup tahini
– 1/4 cup fresh lemon juice (about 2 medium lemons)
– 2 tablespoons extra virgin olive oil (plus extra for drizzling)
– 1 teaspoon ground cumin
– Sea salt, to taste
– Water, as needed for blending
These ingredients blend together to create a smooth and creamy dip. If you opt for dried chickpeas, soak them overnight to soften. You can also use canned chickpeas for a quicker option. The roasted garlic adds a sweet and nutty flavor that makes this dip special.
Optional Garnishes
You can elevate your hummus with these garnishes:
– 1/4 teaspoon smoked paprika (optional, for garnish)
– Fresh parsley, finely chopped, for garnish
These garnishes not only add color but also enhance the taste. The smoked paprika gives a subtle smokiness, while fresh parsley adds a burst of freshness.
Nutritional Information
Roasted garlic hummus is a healthy choice. Here’s a quick look at the benefits:
– Chickpeas are high in protein and fiber.
– Olive oil provides healthy fats.
– Garlic offers immune support and flavor.
This dip is perfect for parties or snacks. You can enjoy it guilt-free while sharing a delightful dish with friends and family. For the complete recipe, check out the Full Recipe section.
Step-by-Step Instructions
How to Roast Garlic
Roasting garlic turns it sweet and soft. Start by preheating your oven to 400°F (200°C). Take a head of garlic and slice off the top. This exposes the cloves. Drizzle about a teaspoon of olive oil on top. Wrap the garlic in aluminum foil to keep it moist. Place it in the oven and roast for 30-35 minutes. You want the cloves to be soft and golden. After roasting, let it cool slightly before you handle it.
Preparation of Chickpeas
You can use dried or canned chickpeas. If you choose dried, soak them in water overnight. After soaking, drain and rinse them. Then, boil the chickpeas in fresh water for 1-2 hours until they are tender. If using canned chickpeas, just drain and rinse them under cool water. This step makes sure your hummus will be smooth and creamy.
Blending the Hummus
Now, it’s time to blend! In a food processor, add the cooked chickpeas or the drained canned ones. Squeeze the roasted garlic cloves out of their skins and add them in. Then, toss in the tahini, fresh lemon juice, olive oil, ground cumin, and a pinch of salt. Process everything until smooth and creamy. If the mix is too thick, add water a little at a time, blending until you reach the right texture. Taste your hummus and adjust the seasoning if needed. You can add more salt, lemon juice, or cumin to suit your flavor.
Once blended, transfer your hummus into a serving bowl. Drizzle with extra olive oil and sprinkle with smoked paprika and fresh parsley for a lovely finish. You can find the full recipe for this delightful dip above. Enjoy it as a tasty snack or a spread!
Tips & Tricks
Achieving the Perfect Consistency
To get the best creamy hummus, you need to blend well. Start with cooked chickpeas. If your hummus is too thick, add water slowly. Use one tablespoon at a time. Blend after each addition until you reach the creaminess you want. A smooth texture is key for a great dip.
Flavor Enhancements and Substitutions
You can boost the flavor of your hummus easily. Add fresh herbs like basil or cilantro for a twist. If you want heat, try adding a pinch of cayenne pepper. You can swap tahini for sunflower seed butter for a nut-free version. Lemon zest can also add a bright kick to your hummus.
Common Mistakes to Avoid
One common mistake is not seasoning enough. Always taste your hummus before serving. Adjust salt, lemon juice, or cumin to fit your taste. Another mistake is undercooking the chickpeas. They should be soft and tender for smooth blending. Lastly, don’t skip the roasting of garlic; it adds a sweet depth that fresh garlic cannot provide.
For the full recipe, be sure to check the steps I laid out earlier. Enjoy making your roasted garlic hummus!

Variations
Spicy Roasted Garlic Hummus
If you like heat, try adding chili powder or cayenne. Start with a pinch, and blend it into your hummus. Taste and add more if you want it spicier. You can also use fresh jalapeños for a different kick. This spicy version pairs well with crunchy veggies and pita chips.
Herb-Infused Roasted Garlic Hummus
For a fresh twist, add herbs like basil or cilantro. Chop them finely and blend them right into the hummus. You can also mix in dried herbs like oregano or thyme. This herb-infused hummus is perfect as a dip or a spread on sandwiches.
Roasted Garlic Hummus with Nuts
Nuts add a nice crunch and extra flavor. Try almond or pistachio. Simply blend a handful of nuts into the hummus. You can also top the hummus with whole nuts for a beautiful presentation. This version is delightful with warm pita bread or on a cheese board.
Explore these variations to enjoy your Roasted Garlic Hummus in new ways! For the full recipe, check out the main section.
Storage Info
How to Store Roasted Garlic Hummus
To keep your roasted garlic hummus fresh, use an airtight container. This helps keep out air and moisture. You can store it in the fridge for easy access. If you plan to eat it later, let it cool before sealing.
Shelf Life and Freezing Tips
Homemade hummus lasts about five to seven days in the fridge. If you want to store it longer, freezing is a good option. Put the hummus in a freezer-safe container. It can last up to three months in the freezer. When ready to use, let it thaw in the fridge overnight.
Best Ways to Reheat or Serve Leftovers
You can enjoy your hummus cold or at room temperature. If you prefer it warm, gently heat it in the microwave. Stir it well to ensure even warmth. Serve it with fresh veggies, bread, or as a spread for sandwiches. For more ideas, check out the Full Recipe.
FAQs
How long does homemade hummus last?
Homemade hummus can last about 4 to 5 days in your fridge. Make sure to store it in an airtight container. If you see any signs of mold or it smells off, it’s best to throw it out. For longer storage, you can freeze hummus. It will last for up to 3 months in the freezer. Just thaw it in the fridge before you use it.
Can I use store-bought roasted garlic?
Yes, you can use store-bought roasted garlic if you’re short on time. It saves you the hassle of roasting garlic yourself. Just mash it up and mix it into your hummus as you would with fresh roasted garlic. This way, you still get that nice garlic flavor without the extra steps.
What can I serve with roasted garlic hummus?
You can serve roasted garlic hummus with many tasty options. Here are some great ideas:
– Pita bread, cut into triangles
– Fresh veggies like carrots, cucumbers, and bell peppers
– Crackers or tortilla chips
– Spread on sandwiches or wraps
– As a dip for falafel or grilled meats
Feel free to get creative! Roasted garlic hummus is a versatile dip that pairs well with many foods. For the full recipe, check out the section above.
Roasted garlic hummus is easy to make and delightfully tasty. We covered the key ingredients and how to roast garlic to enhance flavor. I shared tips for the right texture and common pitfalls to avoid. Don’t forget to explore fun variations and garnishes to impress. Lastly, proper storage ensures you enjoy every bit later. With this guide, you can whip up perfect hummus that delights all. Start experimenting, and enjoy your delicious creations!

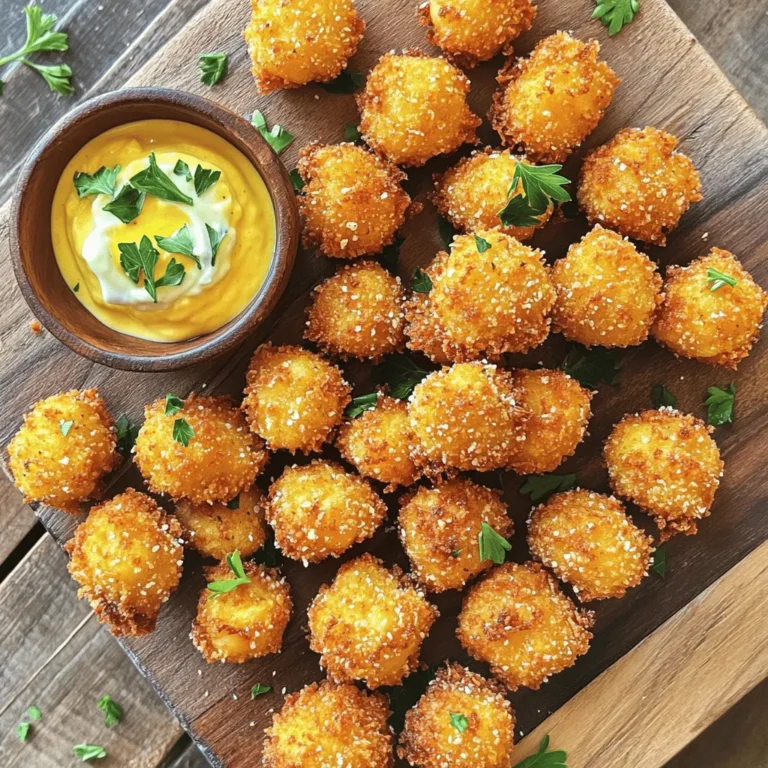
![For my crispy baked chicken tenders, you need: - 1 lb chicken breast tenders - 1 cup whole wheat breadcrumbs - 1/2 cup grated Parmesan cheese - 1 teaspoon garlic powder - 1 teaspoon onion powder - 1 teaspoon smoked paprika - 1/2 teaspoon black pepper - 1/2 teaspoon salt - 2 large eggs - 2 tablespoons Dijon mustard - 1 tablespoon olive oil These ingredients make the tenders crispy and tasty. You can add extra flavor with these optional seasonings: - 1 teaspoon cayenne pepper for heat - 1 teaspoon dried oregano for a herby taste - 1 teaspoon Italian seasoning for more depth Feel free to mix and match to suit your taste! Each serving of these chicken tenders has: - Calories: 320 - Protein: 30g - Carbohydrates: 20g - Fat: 15g These chicken tenders are a healthy choice. For the full recipe, check out the cooking guide! To start, preheat your oven to 425°F (220°C). This high heat helps to create a crispy outer layer. Next, line a baking sheet with parchment paper. This step keeps the tenders from sticking and helps them cook evenly. In a big bowl, mix together one cup of whole wheat breadcrumbs, half a cup of grated Parmesan cheese, one teaspoon of garlic powder, one teaspoon of onion powder, one teaspoon of smoked paprika, half a teaspoon of black pepper, and half a teaspoon of salt. Set this aside. Now, crack two large eggs into another bowl. Whisk them with two tablespoons of Dijon mustard until smooth. This mixture will help the breadcrumbs stick to the chicken. Take each chicken tender and dip it into the egg mixture. Make sure it gets fully coated. Then, shake off the extra liquid and roll it in the breadcrumb mix. Press gently so the crumbs stick well. Place the coated chicken tenders on the baking sheet with space between them. To get that extra crispy texture, drizzle one tablespoon of olive oil over the top. Bake the tenders for 15 to 20 minutes. Flip them halfway to ensure even browning. They are ready when they are golden brown and reach an internal temperature of 165°F (74°C). To achieve the best crispiness, use whole wheat breadcrumbs. They provide a great texture. Don’t skip the olive oil drizzle; it helps the tenders brown nicely. Also, make sure the chicken tenders are not crowded on the baking sheet. Proper air flow is key for crispiness. If you want an even crunchier finish, try broiling the tenders for the last 2-3 minutes. Just watch them closely to prevent burning! Imagine your kitchen filled with rich aromas while those chicken tenders bake. Picture the golden-brown crust forming on each tender. As they cook, you’ll see the crispiness develop. When they are finished, let them rest for a few minutes. This time lets the juices settle in, making each bite juicy and tender. For a complete recipe, click on [Full Recipe]. When making crispy baked chicken tenders, avoid these common mistakes: - Not drying the chicken: Wet chicken will not crisp up well. Pat it dry with paper towels. - Skipping the egg wash: The egg mixture helps the breadcrumbs stick. Don't skip this step. - Overcrowding the baking sheet: Space out the tenders to allow hot air to circulate. This helps them cook evenly. - Not flipping the tenders: Flip them halfway through baking for an even golden color. To ensure your chicken is perfectly cooked: - Use a meat thermometer: Check the internal temperature. It should reach 165°F (74°C). - Choose even-sized tenders: This helps them cook at the same rate. - Avoid opening the oven too often: Each time you open the door, the heat escapes. Keep it closed for even cooking. Dipping sauces can elevate your chicken tenders. Here are a few favorites: - Honey mustard: A sweet and tangy option. - Ranch dressing: Creamy and herby, it pairs well with chicken. - Buffalo sauce: For those who like heat, this spicy option is perfect. - Barbecue sauce: A classic choice that adds a smoky flavor. For a full recipe, check the [Full Recipe] section and enjoy the process of making these tasty chicken tenders! {{image_4}} If you like heat, try adding spices. You can mix cayenne pepper or chili powder into the breadcrumb mix. This adds a kick to the crispy coating. You can also use hot sauce in the egg mixture. Just a few drops can spice things up nicely. For a gluten-free version, swap whole wheat breadcrumbs for gluten-free ones. You can use crushed cornflakes or almond flour. Both options give a tasty crunch. Ensure all other ingredients are gluten-free, too. This way, everyone can enjoy these tenders. Experiment with different coatings to keep things exciting. Try using crushed potato chips or panko breadcrumbs for a lighter texture. You can also mix herbs like Italian seasoning or dried basil into the coating. Each change can give a new flavor twist. For the full recipe, check out the details above. After enjoying your crispy baked chicken tenders, you may have some left. To store them, let the tenders cool down first. Place them in an airtight container. This keeps them fresh and safe. You can keep them in the fridge for up to three days. If you want to enjoy them later, consider freezing them. Reheating chicken tenders can be tricky. You want them crispy, not soggy. To do this, heat your oven to 375°F (190°C). Place the tenders on a baking sheet lined with parchment paper. Bake for about 10-15 minutes. Flip them halfway through for even crispiness. You can also use an air fryer for a quick and crunchy option. Freezing is a great way to keep your chicken tenders for longer. First, let them cool completely. Next, place them in a single layer on a baking sheet and freeze for 1-2 hours. Once frozen, transfer them to a freezer-safe bag or container. They can last up to three months in the freezer. When you're ready to eat, just reheat as mentioned above. Enjoy your delicious meal anytime! Crispy baked chicken tenders take about 15 to 20 minutes to bake. I recommend setting your oven to 425°F (220°C) for the best results. Thin tenders cook faster, while thicker ones may need a bit more time. Always check for a golden brown color and ensure the internal temperature reaches 165°F (74°C). This way, you know they are both safe and tasty. Yes, you can use frozen chicken tenders! Just remember to thaw them first. It’s best to let them sit in the fridge overnight. If you're in a hurry, you can use the microwave. Once thawed, follow the same steps as if you were using fresh tenders. Adjust your baking time if needed, as they may require a few extra minutes to cook through. Crispy baked chicken tenders pair well with many sides. Here are some ideas: - Fresh salad with mixed greens - Steamed broccoli or green beans - Sweet potato fries - Classic coleslaw - Macaroni and cheese - Dipping sauces like honey mustard or ranch These sides make your meal balanced and more fun. For a complete recipe, check the [Full Recipe]. In this blog post, we explored the essential ingredients for chicken tenders and how to cook them perfectly. We covered tips to ensure a crispy finish and shared common mistakes to avoid. We also looked at tasty variations, storage info, and answered FAQs. Perfect chicken tenders are within your reach. With a few tricks, you can impress anyone. Enjoy your cooking and the delicious results!](https://tastyrecipes.blog/wp-content/uploads/2025/06/fa7849e2-4dbe-40b9-85b5-9d4524545ebb-768x768.webp)